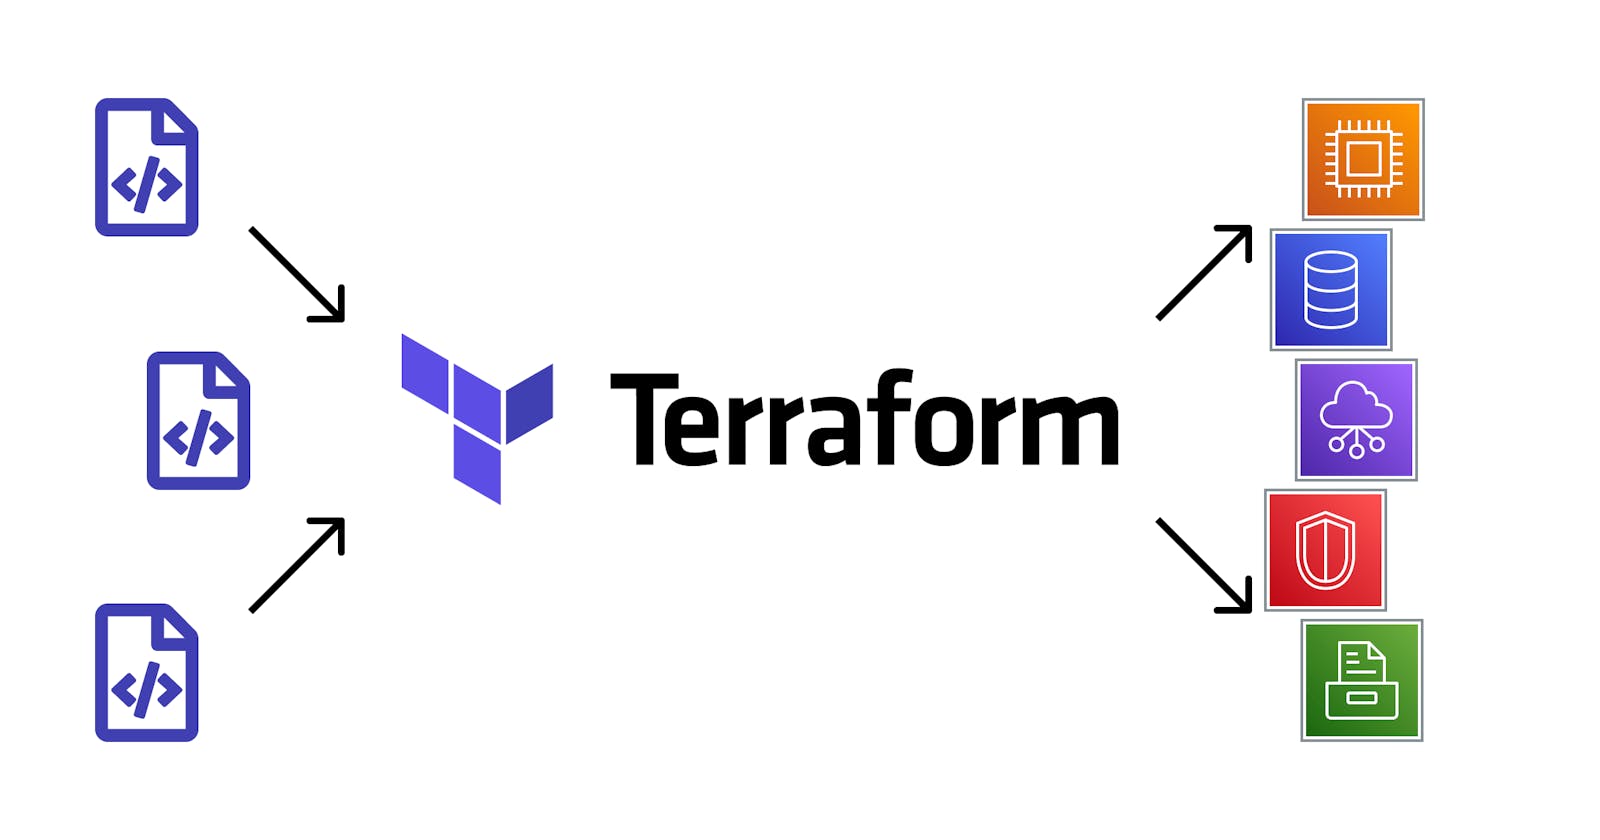
Terraform Basics Configuration Language for DevOps Engineer
Day 2 of #TerraWeek
Table of contents
- 📝Introduction
- 📝Task 1: Familiarize with HCL syntax used in Terraform
- Terraform Block
- Provider block
- Resource Block
- Variable Block
- Locals Block
- Data Block
- Module Block
- Output Block
- Provisioner Block
- Parameters
- Arguments
- Resources
- Data sources
- 📝Task 2: Variables, data types, and expressions in HCL
- 📝Task 3 - Practice writing Terraform configurations using HCL syntax
📝Introduction
Today, in this blog post, we will cover the basics of configuration HCL language from Terraform, and familiarize ourselves with its syntax and core elements. This is part of #Day 2 of the #TerraWeek challenge initiated by Shubham Londhe.
📝Task 1: Familiarize with HCL syntax used in Terraform
Terraform language is declaring resources, represented by infrastructure objects.
Terraform uses the HashiCorp Configuration Language (HCL), an easy-to-read domain-specific language created by Terraform's developers. The HCL specification is compatible with a JavaScript Object Notation (JSON) variant suitable for machine program generation and parsing.
A Terraform configuration describes how to manage a given collection of infrastructure. This configuration can consist of multiple files and directories.
HCL syntax is basic and should be readable by those familiar with other scripting languages. It has three core elements: blocks, arguments and expressions**.
i.e.
resource "aws_vpc" "main" {
  cidr_block = var.base_cidr_block
}

<BLOCK TYPE> "<BLOCK LABEL>" "<BLOCK LABEL>" {
  # Block body
  <IDENTIFIER> = <EXPRESSION> # Argument
}
Blocks are a container for other contents. They have a block type*, one or more **labels*, and a *body** that contains any number of arguments and nested blocks.*
i.e.
type "label_1" "label_2" {
  argument_1 = value_1
  argument_2 = value_2
}
The Terraform language uses a limited number of top-level block types, which are blocks that can appear outside of any other block in a configuration file. Most of Terraform's features (including resources, input variables, output values, data sources, etc.) are implemented as top-level blocks.
Let's check how is a resource block:
i.e.
resource "aws_instance" "web_server" {
  ami           = "ami-830c94e3"
  instance_type = "t2.micro"

  tags = {
    Name = "my_example"
  }
}
Here we have a block of type resource. Since we are using an AWS provider we can check documentation here.
aws_instance is the first label that points to the type of AWS resource and web_server is the second label that represents the name of the resource. Terraform supports accessing elements using dot notation like so: aws_instance.web_server.tags
Some resources may have required arguments. Checking official docs for the required arguments is always a good idea. In our case, aws_instance has 2 required arguments: ami and instance_type.
As for the tags block, it is a good idea to get into the habit of tagging your resources. In our case, my_example this is our tag name.
Now that we have a general idea of Terraform block, let's explore what kind of blocks we can use in our configurations. Types of Blocks:
terraform block
provider block
resource block
variable block
locals block
data block
module block
output block
provisioner block
Terraform Block
It is used for setting the version of the terraform that we will use. It may also contain required_providers block inside which specifies the versions of the providers we need as well as where Terraform should download these providers from.
This kind of block is often created into a separate file called terraform.tf and this is a good way to separate settings into their own file.
i.e.
terraform {
  required_providers {
    aws = {
      source = "hashicorp/aws"
      version = ">= 5.1.0"
    }
  }
}

provider "aws" {
  # Configuration options
}
Each module should at least declare the minimum provider version it is known to work with, using the >= version constraint syntax. A module intended to be used as the root of a configuration — that is, as the directory where you'd run terraform apply — should also specify the maximum provider version it is intended to work with, to avoid accidental upgrades to incompatible new versions.
Provider block
It specifies a special type of module that allows Terraform to interact with various cloud-hosting platforms or data centres. Providers must be configured with proper credentials before we can use them.
Versions and download locations of providers are often specified inside the terraform block, but you can also specify it inside this block as well.
The ~> operator is a convenient shorthand for allowing the rightmost component of a version to increment. The following example uses the operator to allow only patch releases within a specific minor release.
i.e.
provider "aws" {
  version = "~> 5.1.0"
  region = "eu-west-1a"
}
Do not use ~> (or other maximum-version constraints) for modules, you intend to reuse across many configurations, even if you know the module isn't compatible with certain newer versions. Doing so can sometimes prevent errors, but more often it forces users of the module to update many modules simultaneously when performing routine upgrades. Specify a minimum version, document any known incompatibilities, and let the root module manage the maximum version.
Resource Block
It is used to manage resources such as compute instances, virtual networks, databases, buckets, or DNS resources.
This block represents actual resources with the majority of other block types playing supporting roles.
i.e.
resource "aws_instance" "web_server" {
  ami           = "ami-830c94e3"
  instance_type = "t2.micro"
}
Variable Block
This block is often called an input variable block. The variable block provides parameters for Terraform modules and allows users to customize the data provided to other Terraform modules without modifying the source.
variables are often in their own file called variables.tf. To use a variable it needs to be declared as a block. One block for each variable.
i.e.
variable "my_variable" {
  type = var_type
  description = var_description
  default = value_1
  sensitive = var_boolean_value
}
Terraform has a strict order of precedence for variable settings. This is from highest to lowest:
Command line (
-varandvar-file)
*.auto.tfvarsor*auto.tfvars.json
terraform.tfvars.json
terraform.tfvarsfileEnv variables
Variable defaults
Locals Block
This block is used to keep frequently referenced values or expressions to keep the code clean and tidy.
Locals block can hold many variables inside. Expressions in local values are not limited to literal constants. They can also reference other values in the module to transform or combine them.
These variables can be accessed using local.var_name notation, note that it is called local. when used to access values inside.
i.e.
locals {
  service_name = "test"
  owner        = "Test Team"
  instance_ids = concat(aws_instance.test1.*.id, aws_instance.test2.*.id)
}
Data Block
The primary purpose of this block is to load or query data from APIs other than Terraform's. It can be used to provide flexibility to your configuration or to connect different workspaces. Data is then accessed using dot notation using var identifier.
i.e. var.variable_test
data "data_type" "data_name" {
  variable_test = expression
}
Module Block
They are containers for multiple resources that are used together. It consists of .tf and/or .tf.json files stored in a directory. It is the primary way to package and reuse resources in Terraform.
Every Terraform configuration has at least one model (root module) which contains resources defined in the .tf files.
Modules are a great way to compartmentalize reusable collections of resources in multiple configurations.
i.e. Module structure.

Output Block
This is a block which is almost always present in all configurations, along with main.tf and variables.tf block. It allows Terraform to output structured data about your configuration.
This output can be used by users to see the data in one convenient place, or using this data in other Terraform workspaces, or share the data between modules.
i.e
output "test_server_public_ip" {
  description = "My test output for EC2 public IP"
  value = aws_instance.test_web_server.public_ip
  sensitive = true
}

output "public_url" {
  description = "Public URL for my web server"
  value = "https://${aws_instance.test_web_server.public_ip}:8000/index.html"
}
Provisioner Block
This block allows to specify actions to be performed on local or remote machines to prepare resources for service.
There are two types of Terraform provisioners: local-exec and remote-exec.
local-exec invokes local executables after a resource is created. It runs the process on the machine running Terraform, meaning the machine where you run terraform apply(Your own local computer)
remote-exec invokes remote executable, for example, an EC2 instance on AWS.
This is an example of a provisioner for an EC2 instance. This example contains both local-exec and a remote-exec:
resource "aws_instance" "web_server" {
  # ...

  provisioner "local-exec" {
    command = "Get-Date > test.txt"
    interpreter = ["PowerShell", "-Command"]
  }
  provisioner "remote-exec" {
    inline = [
      "chmod +x /tmp/test.sh",
      "/tmp/test.sh args",
    ]
  }
}
Parameters
They are variables that are defined within HCL blocks. It allows provisioning inputs or configurations to control the behaviour of resources or other components.
They are defined using the parameter_name = value syntax within block declarations.
It can be assigned default values or marked as optional using default values or null.
Arguments
They are the specific values assigned to the parameters within HCL blocks. It provides concrete values to the parameters and influences the behaviour of resources or components.
They are used in key-value pairs to configure attributes within a block and they can be static entries.
Resources
They are the most important element in the Terraform language. Each resource block describes one or more infrastructure objects, such as virtual networks, compute instances, or higher-level components such as DNS records.
Type of Resources:
Compute Resources(i.e. EC2 instance)
Networking Resources(i.e. AWS VPC)
Storage Resources(i.e. AWS S3 bucket)
Database Resources (i.e. AWS RDS)
Security Resources(i.e. AWS SG)
Data sources
It allows Terraform to use the information defined outside of Terraform, defined by another separate Terraform configuration, or modified by functions.
A data source is accessed via a special kind of resource known as a data resource, declared using a data block.
data "aws_ami" "example" {
  most_recent = trueowners = ["self"]
  tags = {
    Name   = "web-server"Tested = "true"
  }
}
Types of Data Sources:
Infrastructure Data Sources(i.e. "aws_vpc")
Cloud Service Data Sources(i.e. "aws_s3_bucket")
DNS Data Sources(i.e. "aws_route53_zone")
Security Data Sources(i.e. "aws_iam_policy")
Database Data Sources(i.e. "aws_db_instance")
📝Task 2: Variables, data types, and expressions in HCL
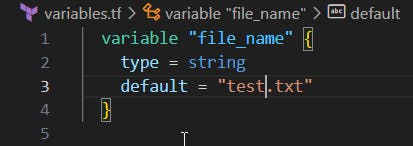
Create a variables.tf file and define a variable.
  variable "file_name" {
    type = string
    default = "test.txt"
  }
Use the variable in a main.tf file to create a "local_file" resource.
We can use the local_file resource to create a file and set its file name using the defined variable.
  resource "local_file" "testfile" {
    filename = var.file_name
    content = "Hi, everyone! This is some tests of Terraform Week Challenge"
  }

Open your CLI, and go to the directory where your Terraform files are located.
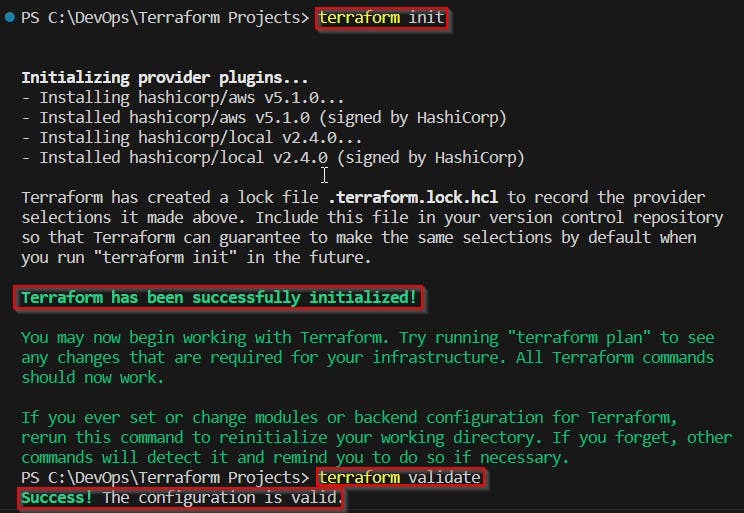
Run terraform init command to initialize the Terraform configuration and download the necessary providers. Run terrafrom validate to validate the files.
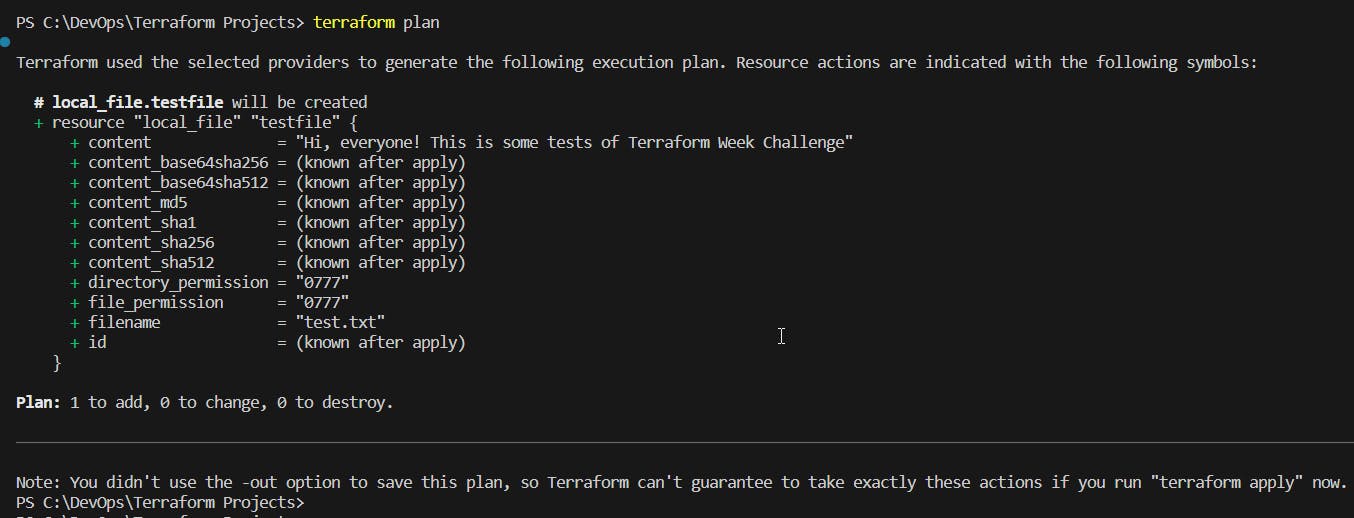
Now, run terraform plan to check your plan and then run terraform apply to create the local_file resource based on your defined variable. It will prompt you to confirm the creation of the resource. If your changes satisfy your requirements, type yes and press Enter to proceed.
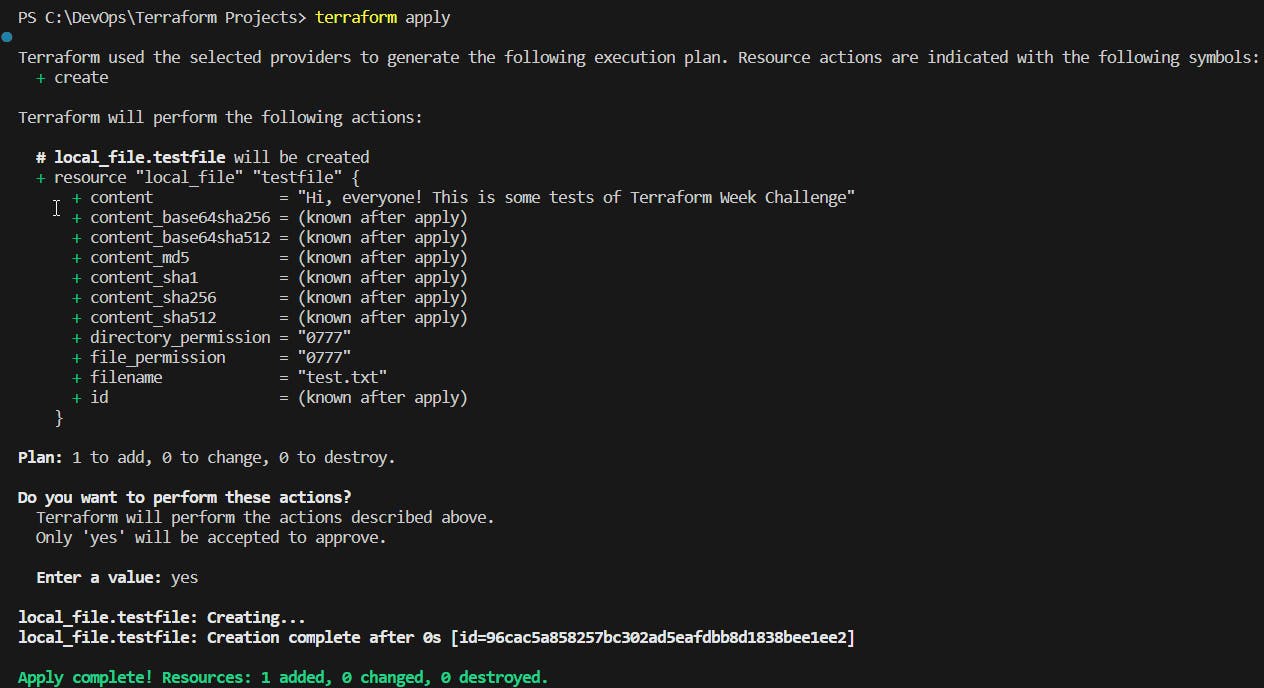
Check if your file was created.

📝Task 3 - Practice writing Terraform configurations using HCL syntax
Add required_providers to your configuration, in this example is AWS.
Open the main.tf file and add required_providers, provider and resource blocks at the file.
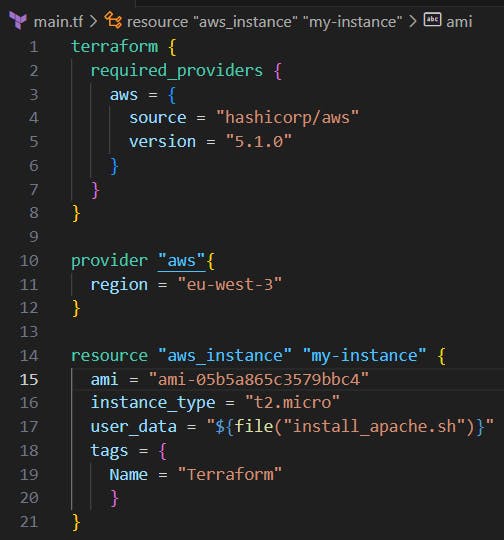
To end, let's test your configuration using the Terraform CLI and make any necessary adjustments.
P.S. - In this example, I added a script on the user_data during the creation of the instance to install and start the Apache service loading a simple HTML file as a test.
Run the terraform init command to initialize the Terraform configuration and download the necessary providers. It will detect the all blocks in the main.tf file.
Run the terraform validate and terraform plan command to check and preview the changes that Terraform will apply.
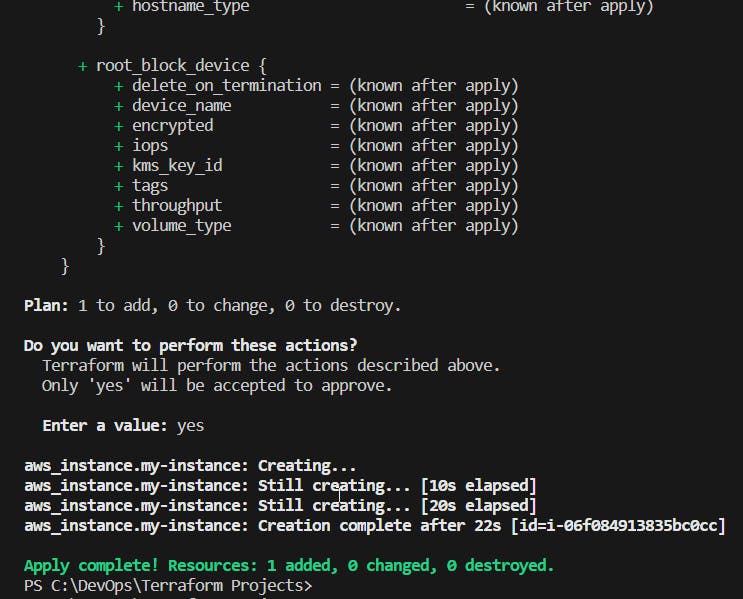
If your plan is fine, then run the terraform apply command to apply the changes and create the resources.


Thank you for reading. I hope you were able to understand and learn something helpful from my blog.
Please follow me on Hashnode and on LinkedIn franciscojblsouza

