


OpenShift Hands-On Lab - Creating an OpenShift Application from Source
OpenShift Learning Path for Cloud and DevOps Engineers


Table of contents
- 📝Introduction
- 📝Set Up CodeReady Containers (For those who choose to run it locally)
- 📝Set Up an OpenShift Sandbox (This was my choice).
- 📝Log In to the Cluster (Option 1)
- 📝Log In to the Cluster (Option 2)
- 📝Create a New Application
- 📝Create a New Route
- 📝Test the Web page
- 📝Checking the resources
- 📝View of the OpenShift Console
📝Introduction
We will create a new OpenShift application from a Source in this lab. The new application will run a simple Apache Web page built from a Git repo.
These are the objectives of this lab:
- Create the New Project
📌Note: The section to create a new project only applies to students using CodeReady Containers. Skip this section if you are using Red Hat OpenShift sandbox.
Create the New Application
Create a New Route
Test the Web Page
📌Note: Due to resource limitations in my Cloud Playground environment, I used the below Red Hat free online resources available for this lab.
To complete this lab, you must first register for a Red Hat Developer login on theRed Hat login page.
Once registered, you may complete the lab steps usingRed Hat's CodeReady Containers or the Red Hat-provided OpenShift sandbox.
Solutions for CodeReady Containers and the Red Hat OpenShift sandbox can be used in this lab. However, I decided to use the free Red Hat-provided OpenShift sandbox available for 30 days.
📝Set Up CodeReady Containers (For those who choose to run it locally)
📌Note: CodeReady Containers has specific hardware and operating system requirements. To ensure your environment is compatible, see Red Hat's minimum system requirements for CodeReady Containers.
Navigate and log in to your Red Hat Developer account.
Under the Local tab, select your OS and click Download CodeReady Containers.
Click Copy Pull Secret for later use.
Install CodeReady Containers.
📌*Note:For OS-specific installation instructions, see [Red Hat's CodeReady Containers installation guide](access.redhat.com/documentation/en-us/red_h..).*
Open a terminal session and set up CodeReady Containers:
crc setupWhen prompted, enter
yesto enable telemetry data collection ornoto disable telemetry data collection.Start the VM:
crc start📌Note: The cluster takes a minimum of 4 minutes to start before serving a request.
When prompted, paste in the previously copied pull request and press Enter.
Print the command needed to add the cached
ocexecutable to your$PATH:crc oc-envRun the printed command.
Log in as the developer user:
oc login -u developer https://api.crc.testing:6443
📝Set Up an OpenShift Sandbox (This was my choice).
To log in through the web UI directly, navigate to the Red Hat CodeReady Containers page and log in to your Red Hat Developer account with the credentials you created.
Select Try OpenShift in our free sandbox.
Click Launch your Developer Sandbox for Red Hat OpenShift.
Confirm your account, enter a valid phone number and click Send Code.
Enter the verification code you received and click Verify Code.
Click Start using your sandbox.
Under Log in with, click DevSandbox.
Select the I have read and agree to the Red Hat OpenShift Online Services Agreement and click SUBMIT.
At the top right, click the shell icon (>_).
Leave the default project selected and click Start.
📌Note1: You will not be able to create new projects in the Sandbox. For any steps in the lab stating you need to create a new project, skip that step and ensure you use one of the existing projects: <username>-dev, or <username>-stage.
📌Note2: Type
qto exit a menu or log.
📝Log In to the Cluster (Option 1)
📌Note: This section only applies to students using CodeReady Containers. Otherwise, skip to the next objective.
Log in to the cluster:
oc login -u developer https://api.crc.testing:6443Open a browser, and log in to the cluster using the console URL.
Use the
developercredentials to log in.
📝Log In to the Cluster (Option 2)
📌Note: To complete a login using oc in the OpenShift sandbox, click on the shell (>_) icon. Alternatively, you can download the binary and log in from a remote system (e.g. VSCode). Please review the Using Red Hat OpenShift Sandbox video detailing the necessary steps for that process.

📝Create a New Application
Create a new application named
appdemotestusing thehttpdimage stream and GitHub repository for theHTMLfile:oc new-app --name=<app_name> httpd~https://github.com/fjblsouza/simple-html-file.git -l app="<app_name>" #Note: It may take several minutes for the app building process to complete.Check the app status:
oc status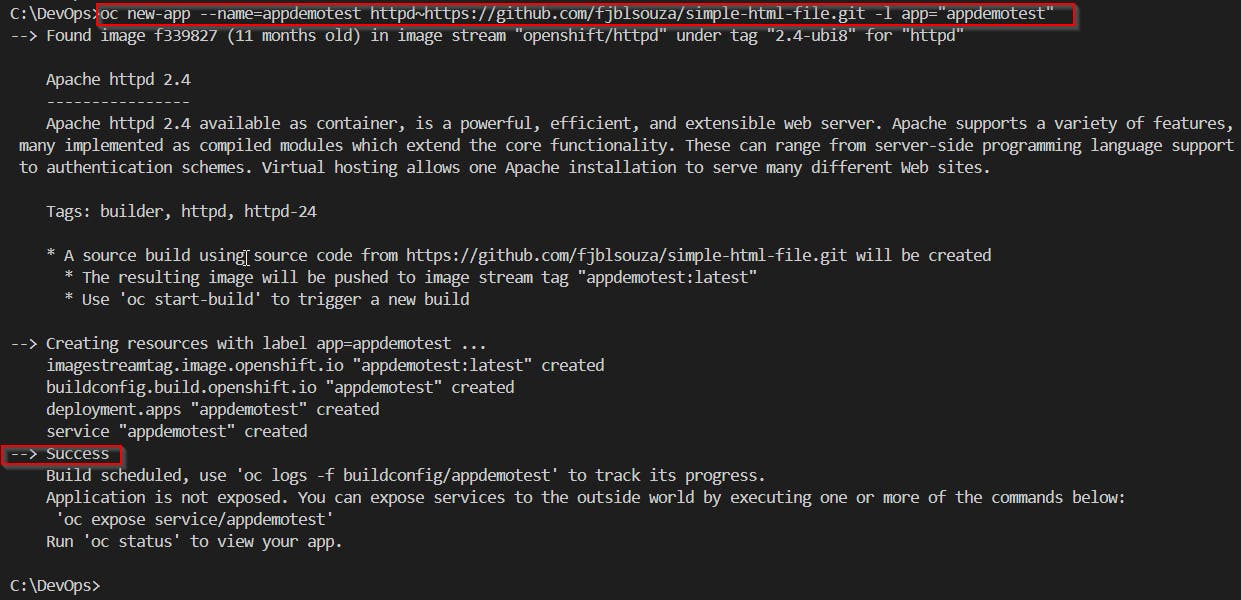

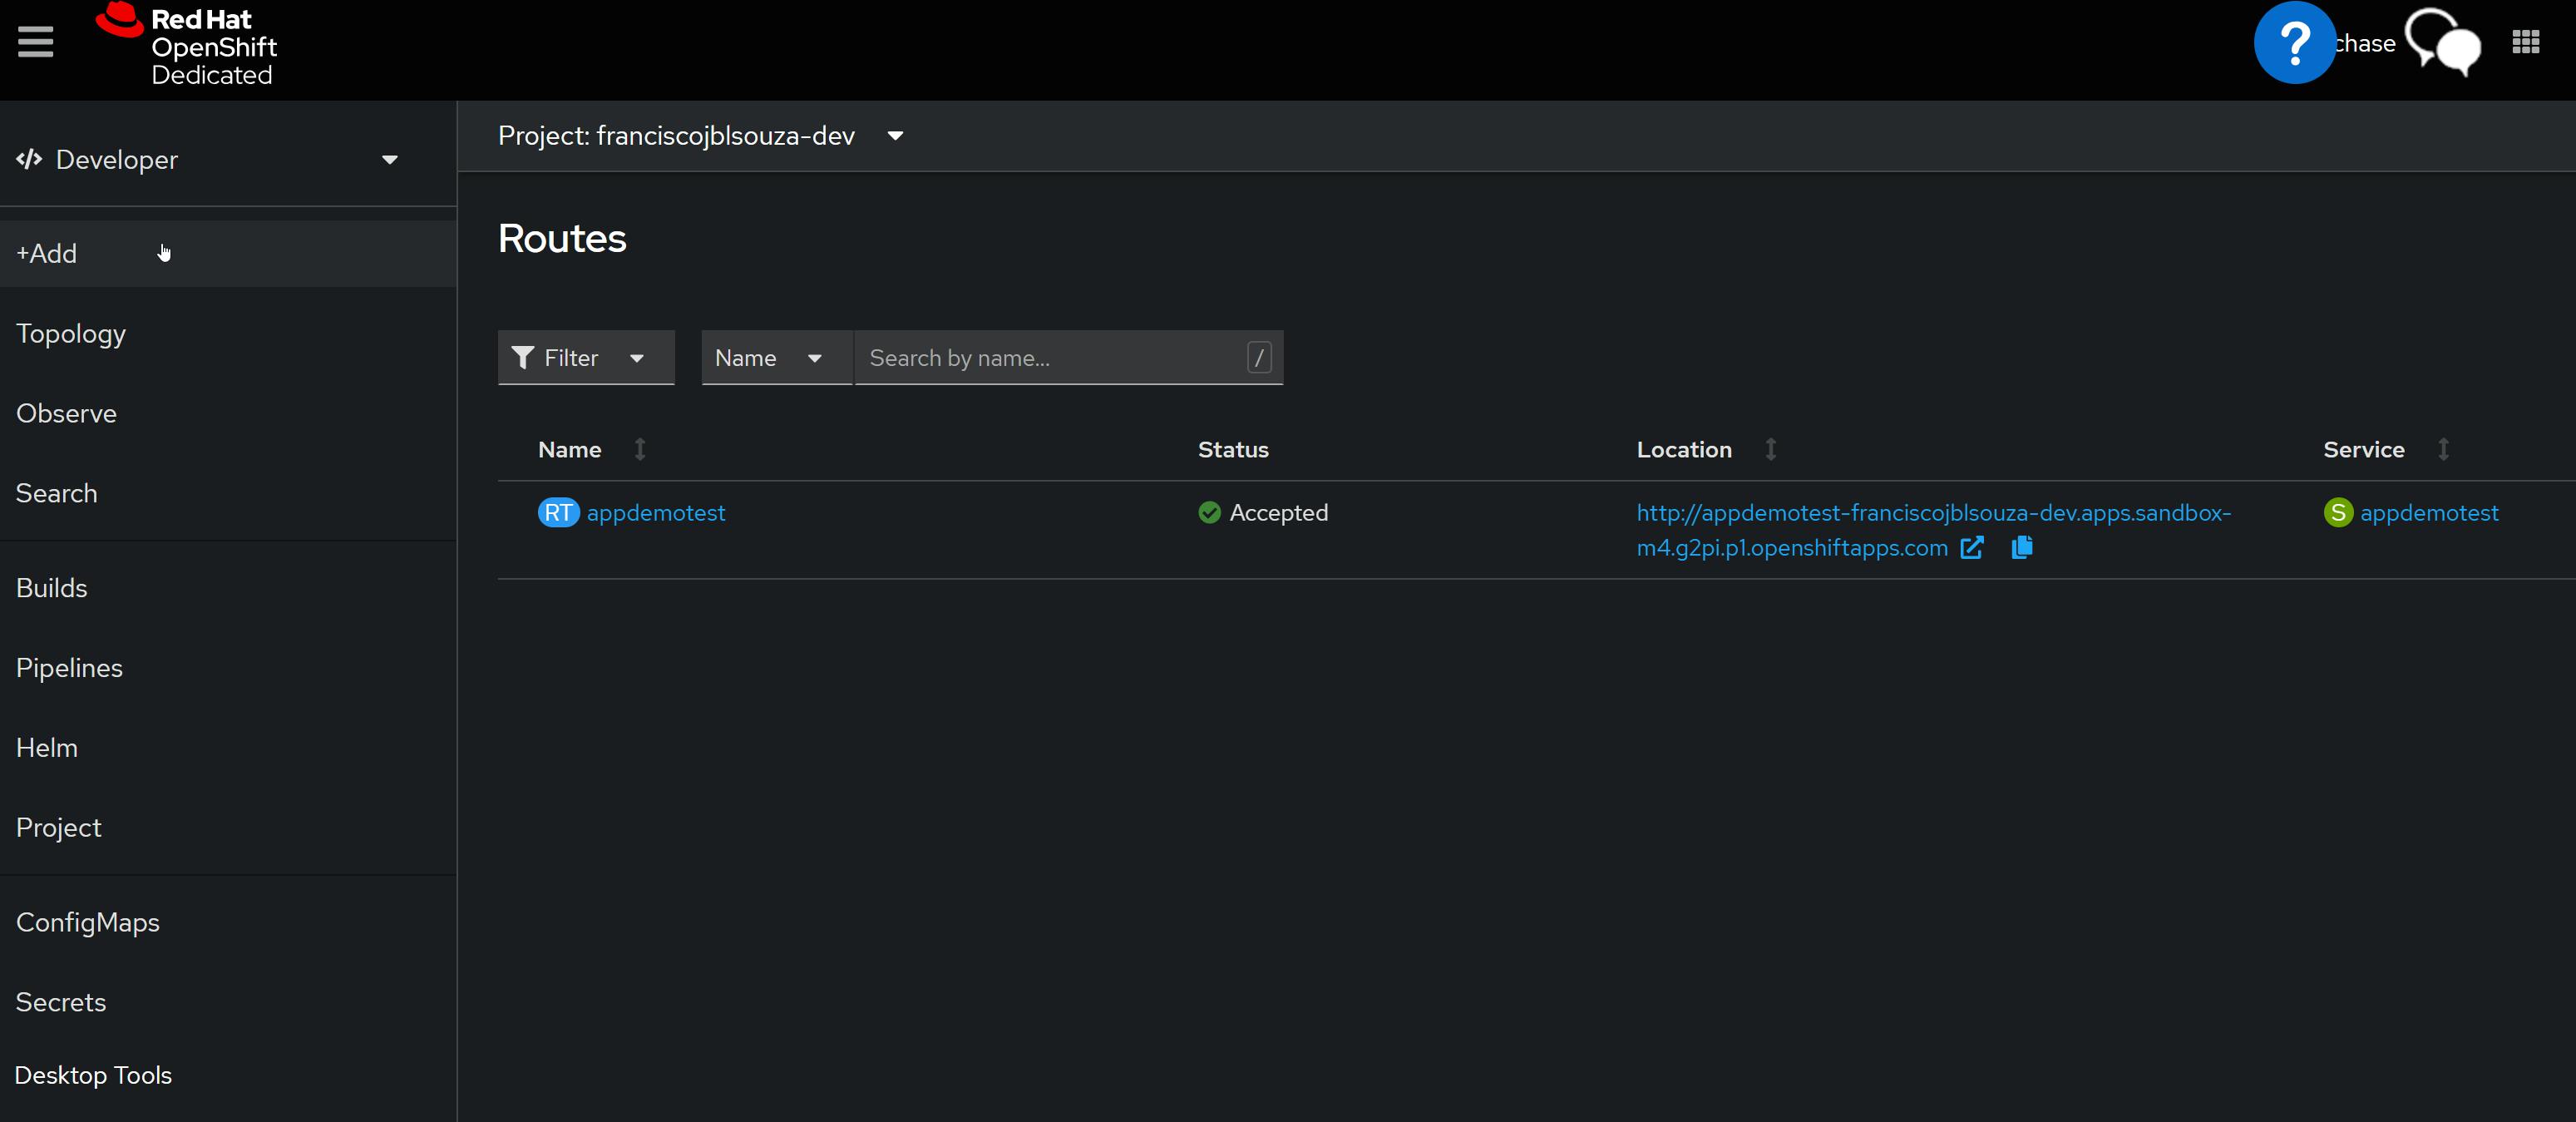
📝Create a New Route
Create a new route to the application by exposing the new service:
oc expose service <app_name>Look up the new route:
oc get routesCopy the hostname of the route for later use.

📝Test the Web page
To view the web page, use a curl command and paste in the previously copied hostname:
curl -s <ROUTE_HOSTNAME>You should now see the HTML of the Web page, also you can try to open it on your browser.


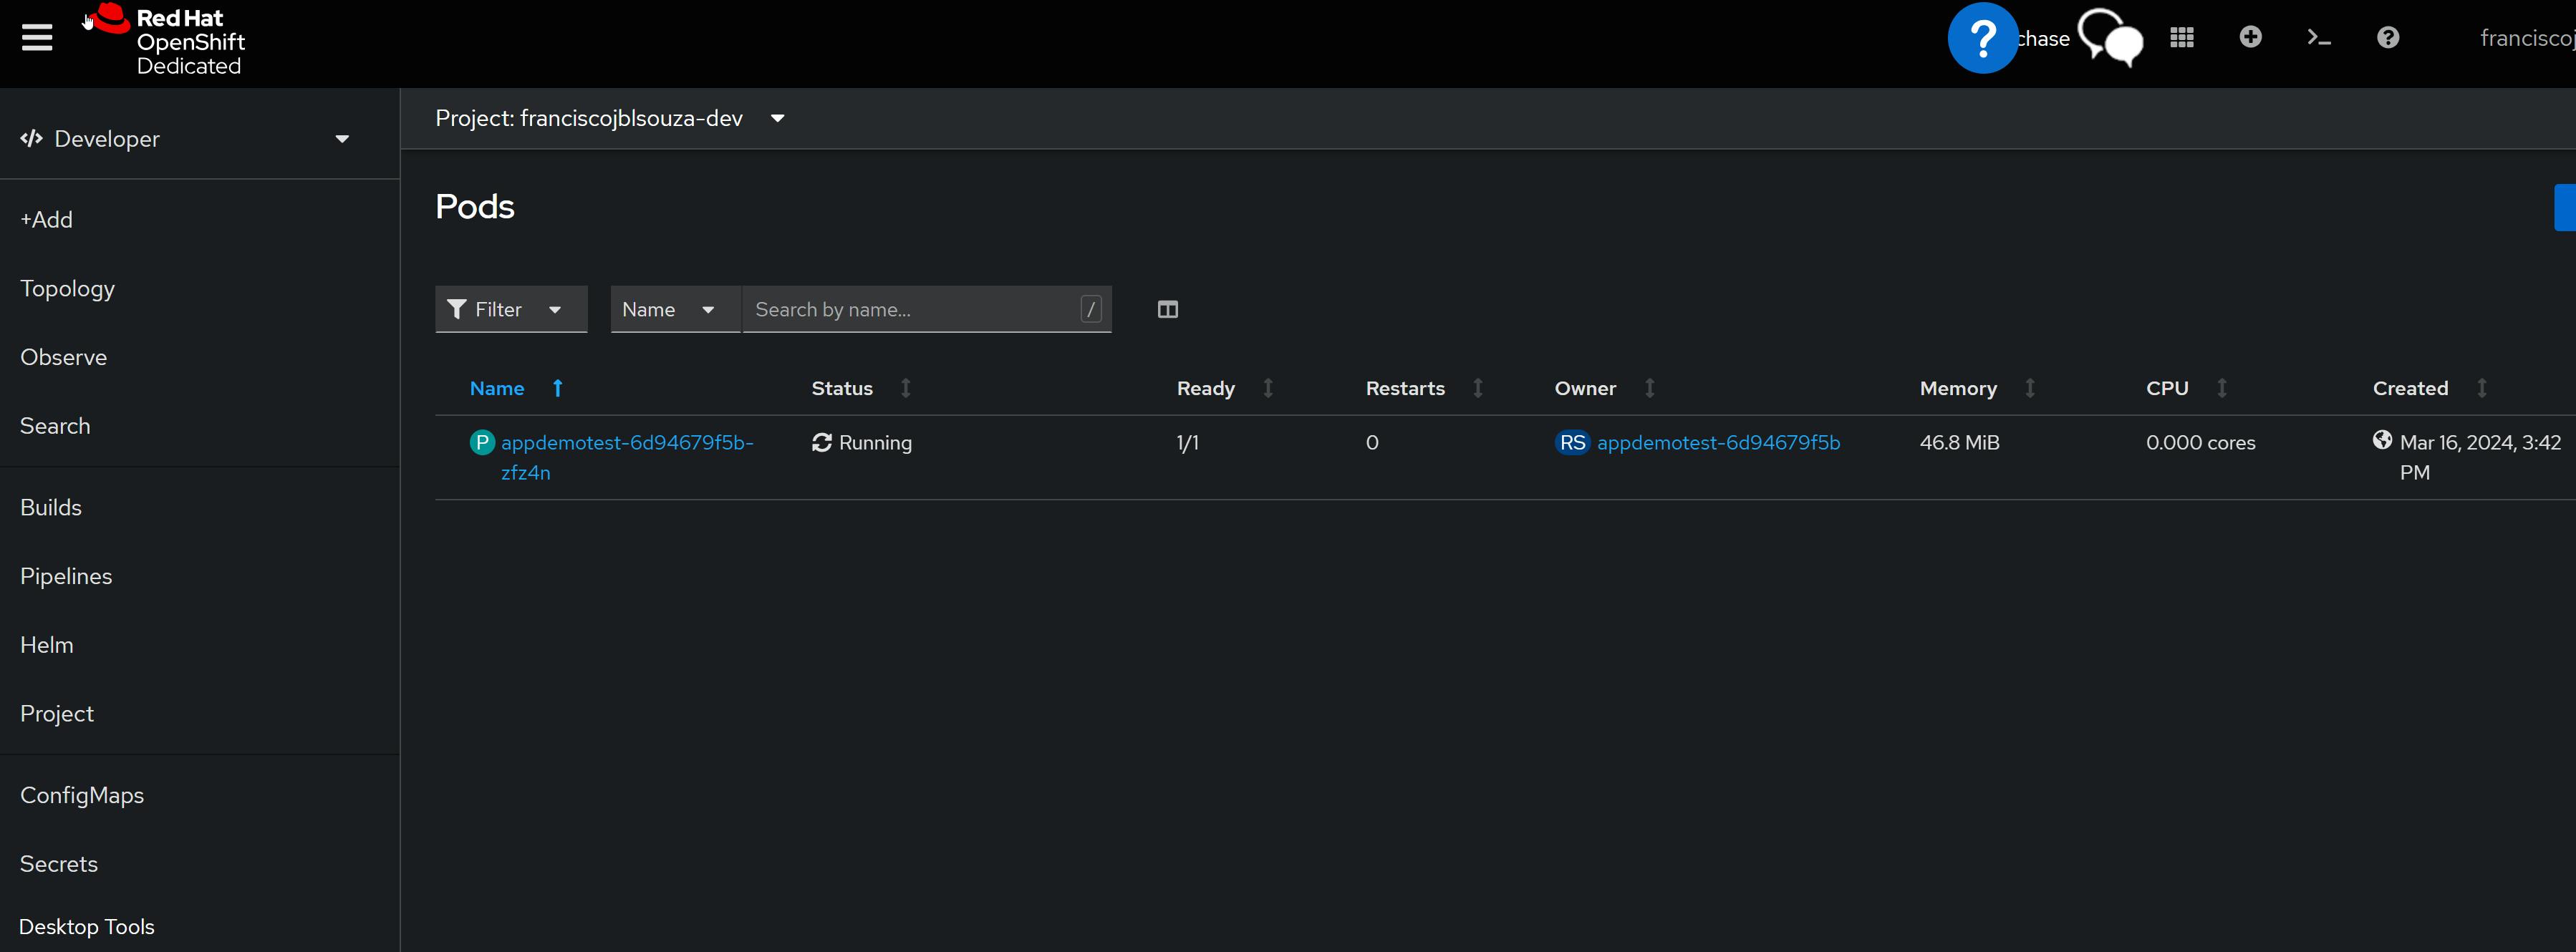
📝Checking the resources
List all the resources on the System, please run the command:
oc get all

List all pods in ps output format with more information (such as node name), please run the command:
oc get pods -o wide
Return a snapshot of
appdemotestlogs from podappdemotest-6d94679f5b-zfz4noc logs <pod_name> -c <container_name>
Start streaming of
appdemotestlogs from podappdemotest-6d94679f5b-zfz4noc logs -f pod/<pod_name> -c <container_name>
Open a Shell session on the Pod, please run the command:
oc rsh <pod_name>
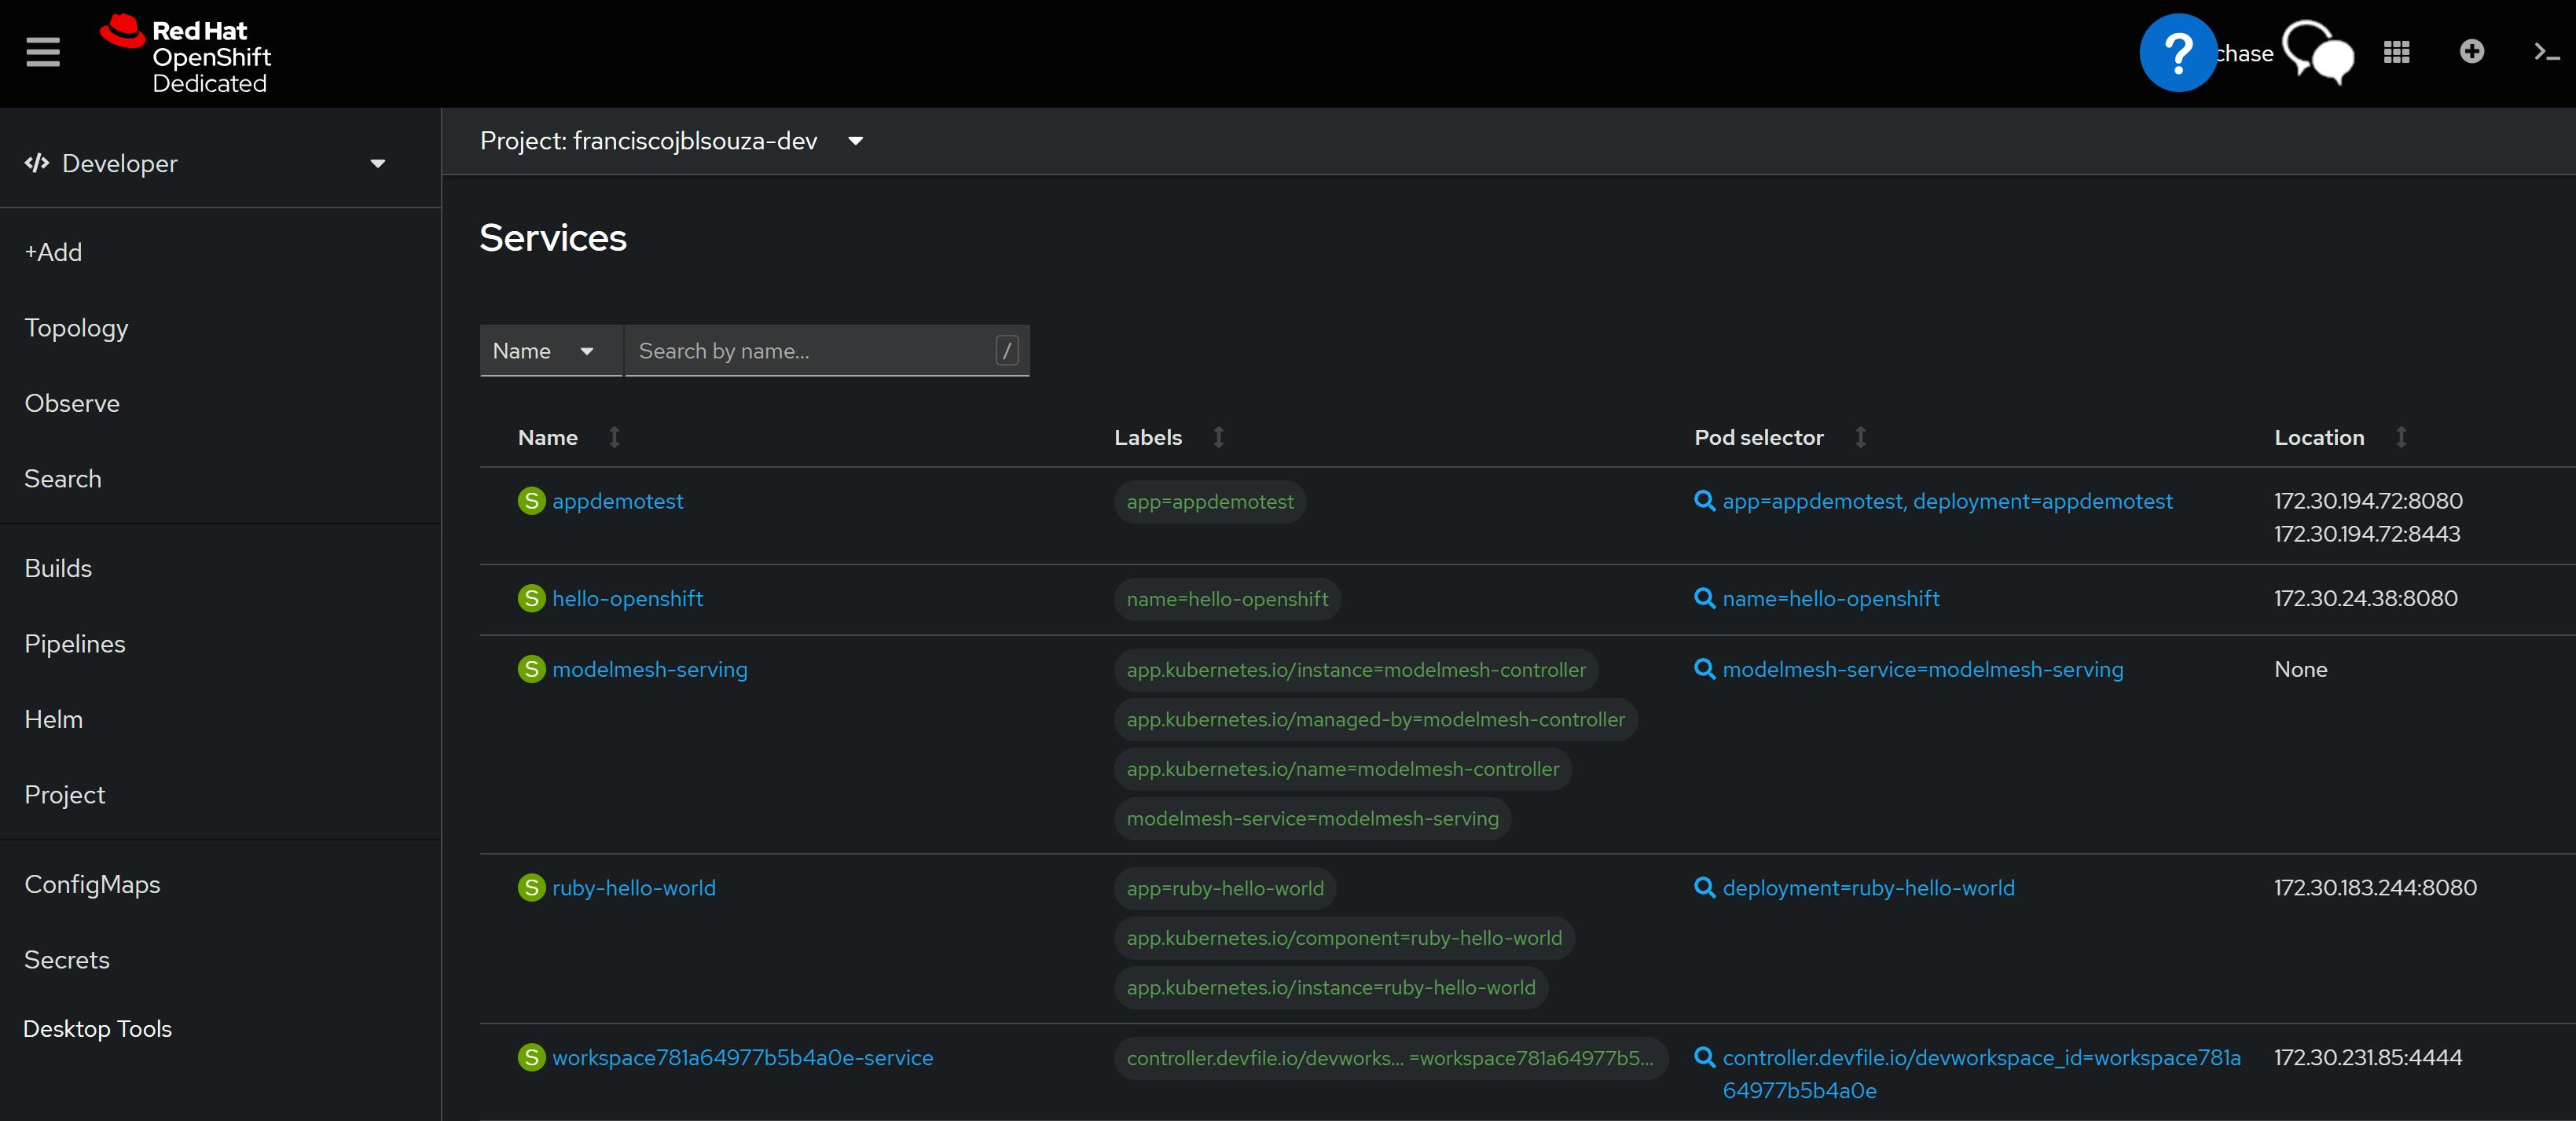
📝View of the OpenShift Console


📌Note - At the end of each hands-on Lab, always clean up all previous resources created to avoid being charged if you used a Cloud Provider to provision them.
Congratulations — you have completed this hands-on lab covering the basics of Creating an OpenShift application from a Source(GitHub) repo.
Thank you for reading. I hope you understood and learned something helpful from my blog.
Please follow me on CloudDevOpsToLearn and LinkedIn, franciscojblsouza