

Linux Hands-On Lab - Install, Config and Manage Cockpit on CentOS 7
Linux Learning Path for Cloud and DevOps Engineers


Table of contents
- 📝Introduction
- 📝Log in to the AWS Management Console
- 📝Install and Configure Cockpit on CentOS 7
- 📝Configure the Cockpit Installation on the First Instance to Manage the Second Instance
- 📝Manage Storage Using Cockpit
- 📝Manage Networking Using Cockpit
- 📝Manage systemd Services Using Cockpit
- 📝Patch the CentOS 7 Servers Using Cockpit
📝Introduction
In this hands-on lab, we will install and manage two CentOS 7 web server instances using Cockpit and launching an NGINX server.
What is Cockipt? It is an easy-to-use, integrated, glanceable, and open web-based interface for managing your Linux servers. It allows you to access your Linux server in a web browser and perform system tasks with a mouse. Starting containers, administering storage, configuring networks, and inspecting logs are easy.
I have not heard of this platform before, so if you have not either, please visit this link for more details as it seems to be very interesting as another tool to support the sysadmins on their daily tasks.
These are the objectives of this lab:
Install and Configure Cockpit on CentOS 7
Manage Storage Using Cockpit
Manage Networking Using Cockpit
Manage systemd Services Using Cockpit
Patch the CentOS 7 Servers Using Cockpit
📝Log in to the AWS Management Console
Using your credentials, make sure you're using the right Region. In my case, I am using AWS as my cloud provider and chose us-east-1. However, for this hands-on lab, you can choose any cloud provider and create your Linux Servers VMs (I am using a CentOS 7 distro).
📌Note: You must create the AWS Access Key and AWS Secret Access Key and configure the AWS CLI in the terminal to use it.
You can use link1 and link2 for it.
📝Install and Configure Cockpit on CentOS 7
📌Note: Switch the user to the root user running the command sudo su -
On the first server:
Install the Cockpit packages:
[root@host1 ]# yum -y install cockpit cockpit-dashboard cockpit-doc cockpit-packagekit cockpit-pcp cockpit-storaged cockpit-system cockpit-ws

Now run that same command on the second server.
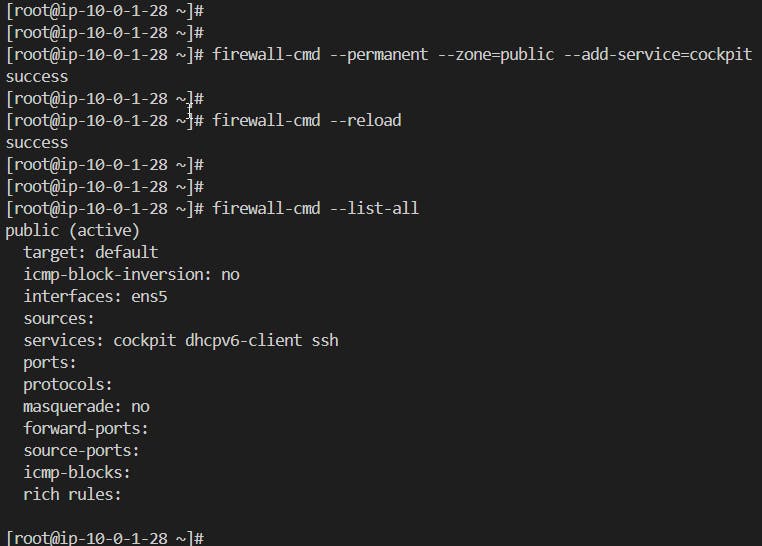
Back on the first server, configure the firewall to allow Cockpit traffic through:
[root@host1 ]# firewall-cmd --permanent --zone=public --add-service=cockpit

[root@host1 ]# firewall-cmd --reload

[root@host1 ]# firewall-cmd --list-all
- Now enable and start the
cockpit.socketservice:
[root@host1 ]# systemctl enable cockpit.socket --now

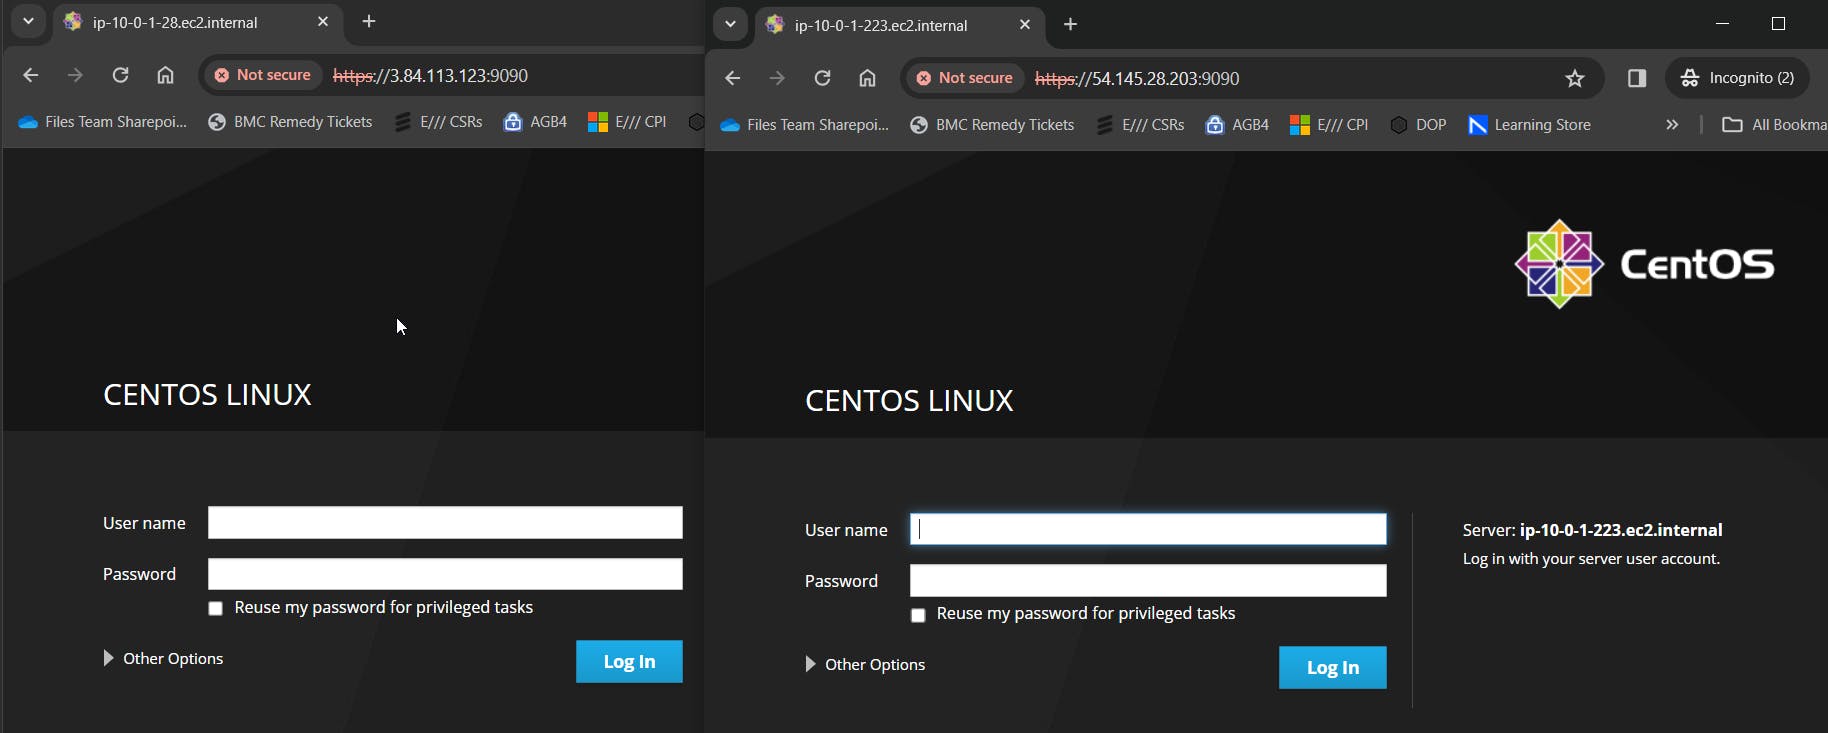
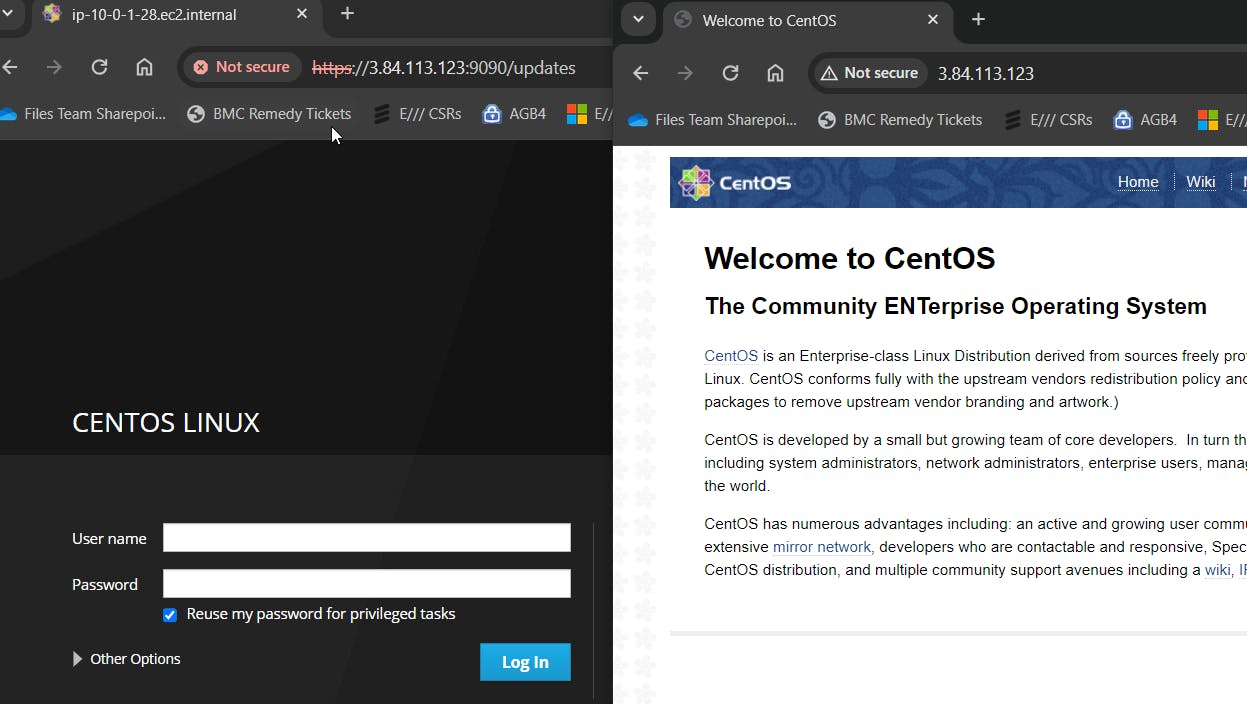
Run those four commands on the second server, then test by connecting to each of their public DNS names on port 9090 with a web browser.
📌Note: Don't log in yet, just get to the login screens.
📝Configure the Cockpit Installation on the First Instance to Manage the Second Instance
On the first host:
In the first server, create and edit the configuration for the second server:
[root@host1 ]# vi /etc/cockpit/machines.d/<give_a_name>.json
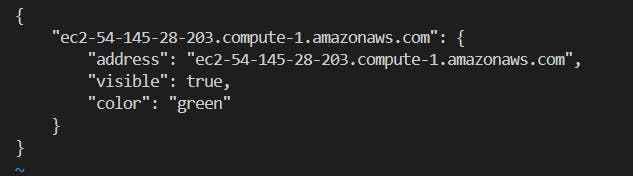
- Add the following, replacing
SERVER_2_DNSwith the DNS name of your second instance:
{
    "SERVER_2_DNS": {
        "address": "SERVER_2_DNS",
        "visible": true,
        "color": "green"
    }
}
- Restart the
cockpit.socketservice:
root@host1 ]# systemctl restart cockpit.socket

Log into the Cockpit web interface on the first server. We should be able to manage the second server from the first now. Be sure to check the Reuse my password for privileged tasks box under where we entered the password.
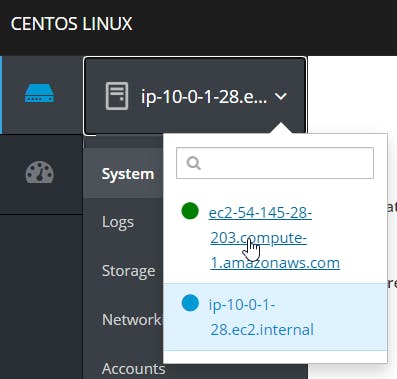
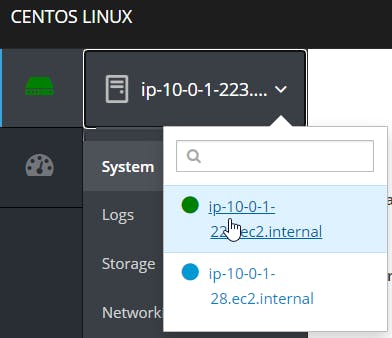
Once we're in the Cockpit interface, click on the system icon, in the upper-left of the screen, then click on the second server in the menu that drops down. It has a green dot next to it. This colour was set, by the way, in
<give_a_name>.json.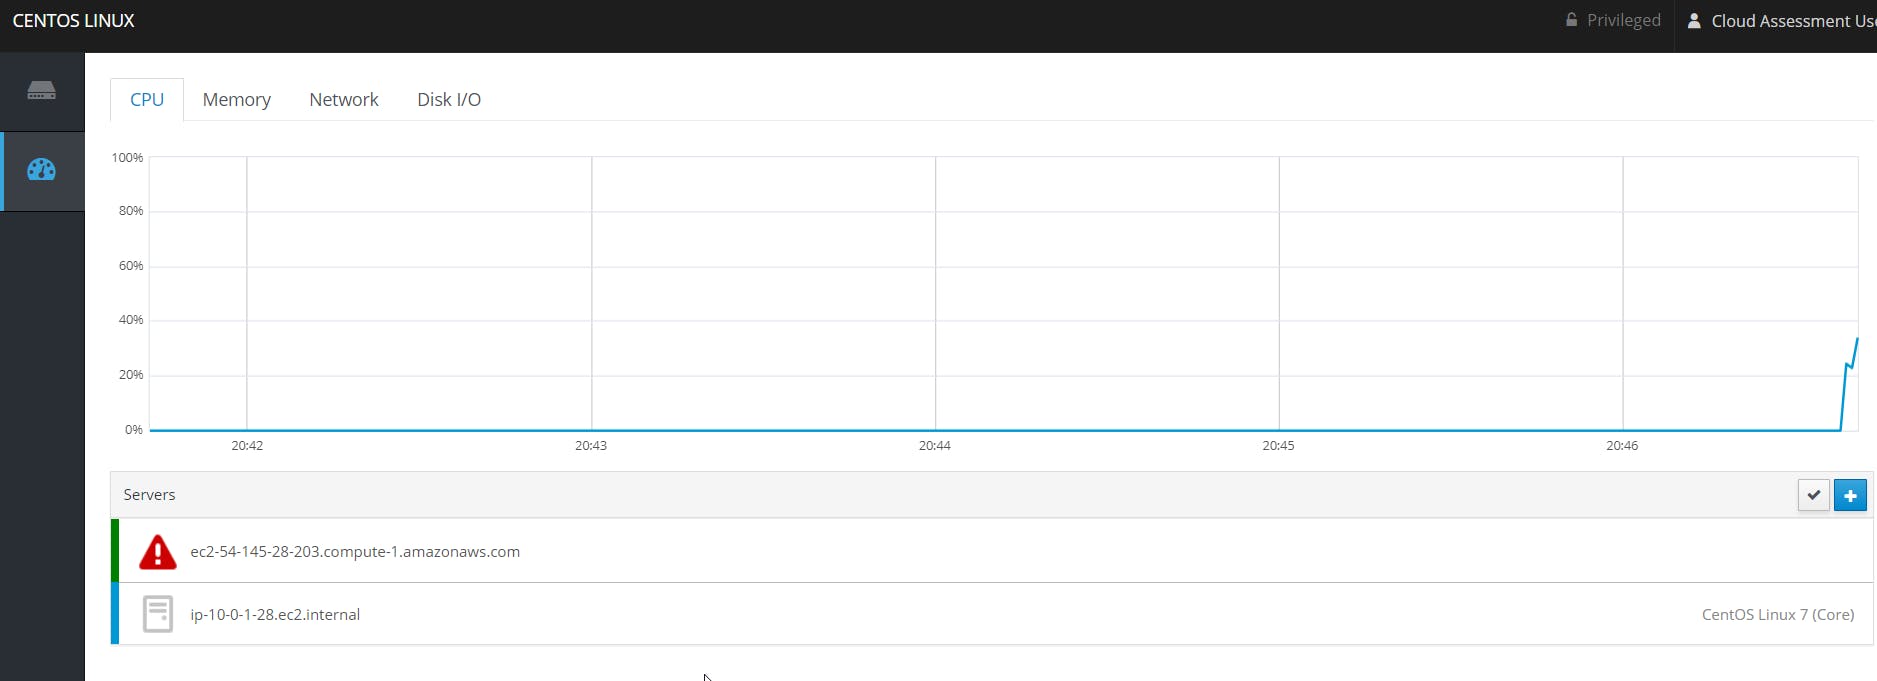
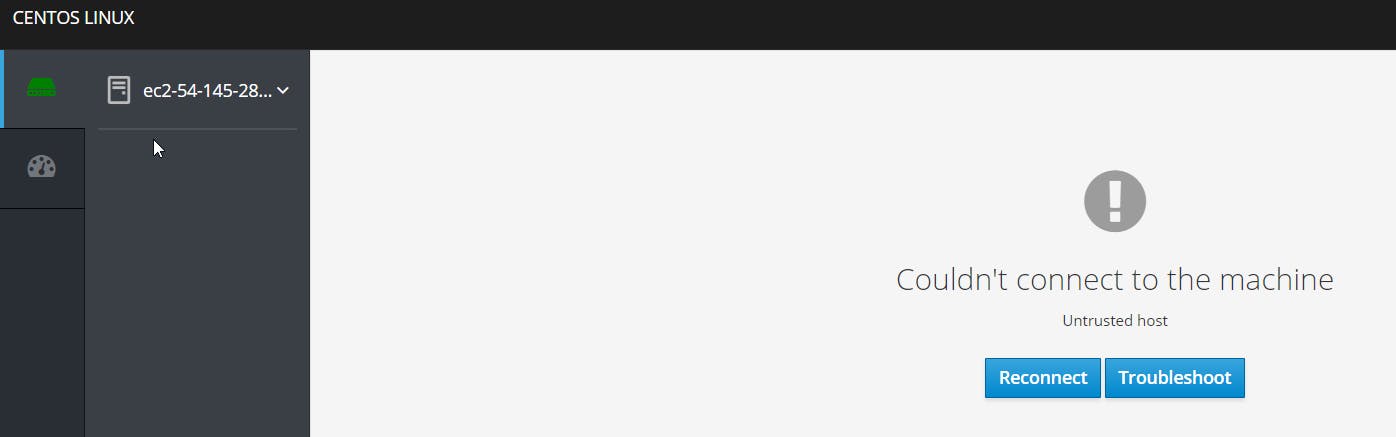
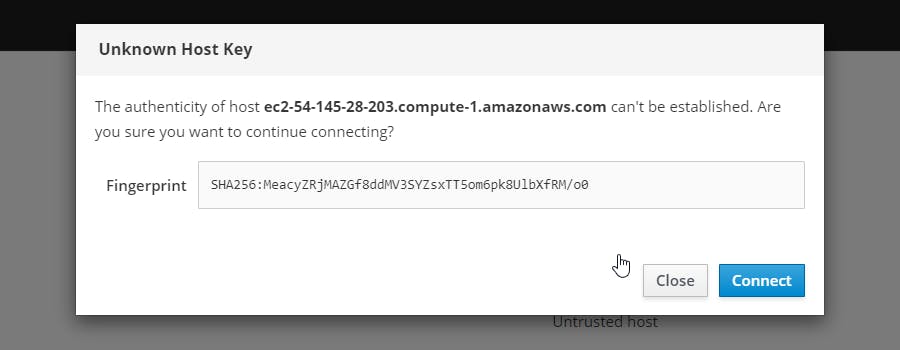
We'll be taken to a screen that tells us Couldn't connect to the machine. Click the Troubleshoot button, and then click the Connect button in the Unknown Host Key window that pops up.
📝Manage Storage Using Cockpit
Create a New RAID-1 Volume (web_data) for Website Data
First, we need to partition, format, and configure a mount point at /web_data.
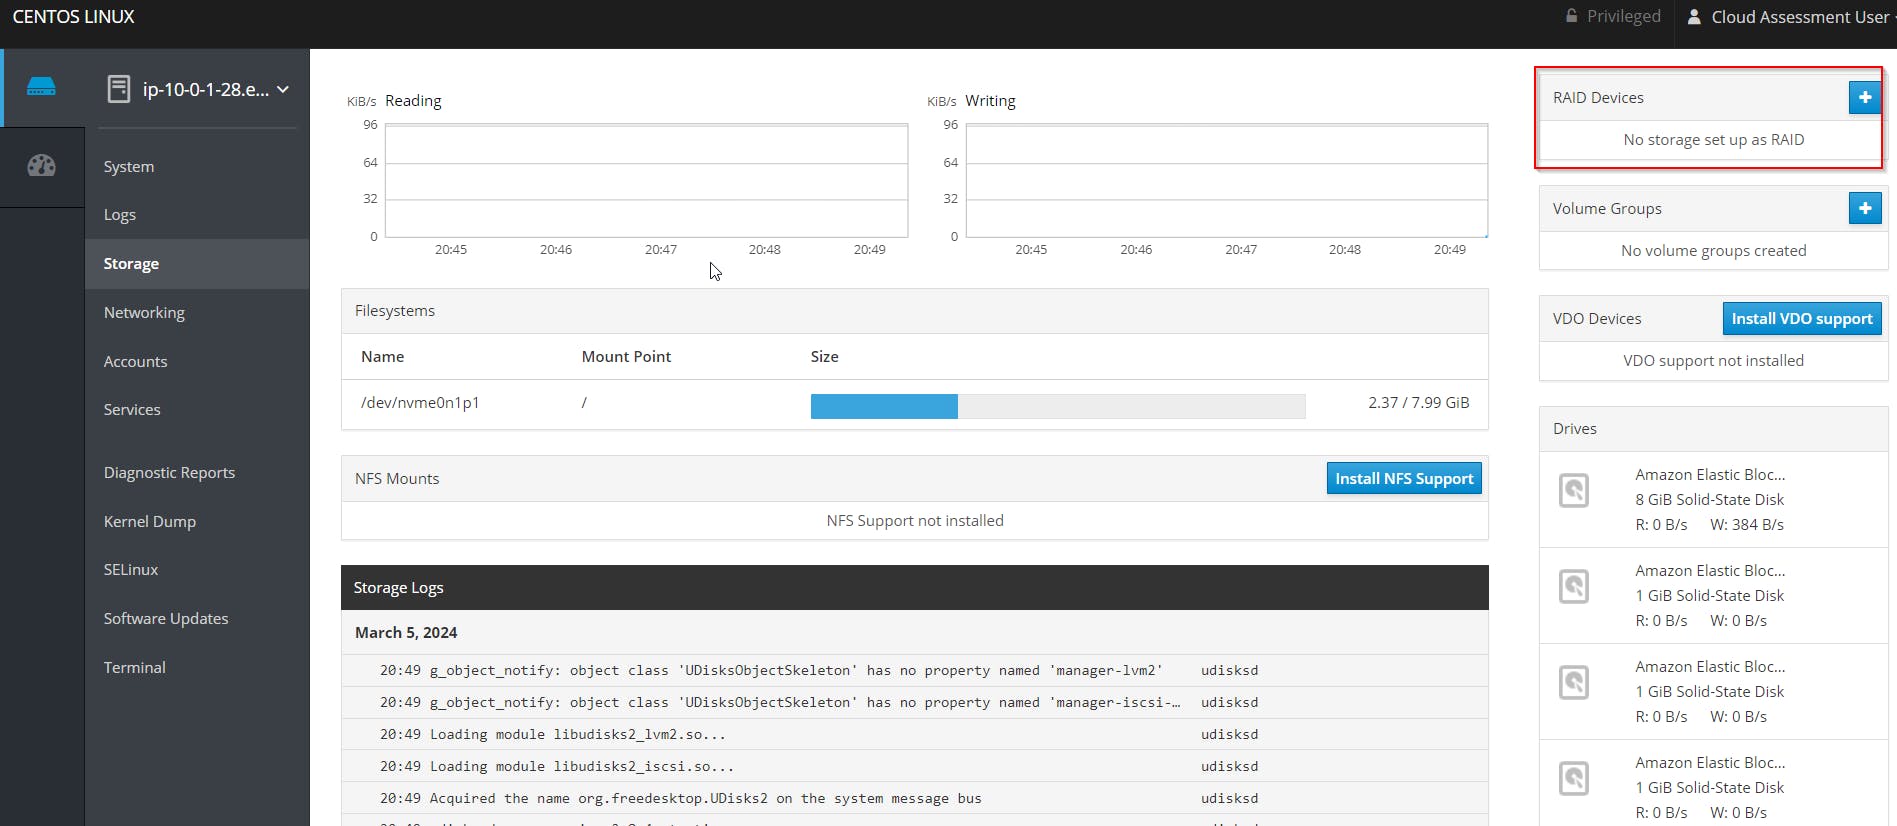
In the Cockpit interface, get into the first server.
Click Storage.
Click the + button in the upper-right of this screen (in the RAID devices section).
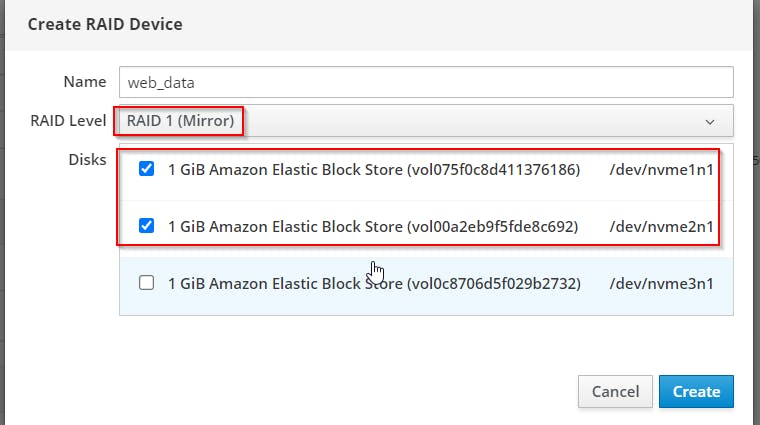
In the window that pops up:
Give this device a Name of web_data.
Set RAID Level to RAID 1.
Check the boxes next to the first two disks in the lower list.
Click Create.
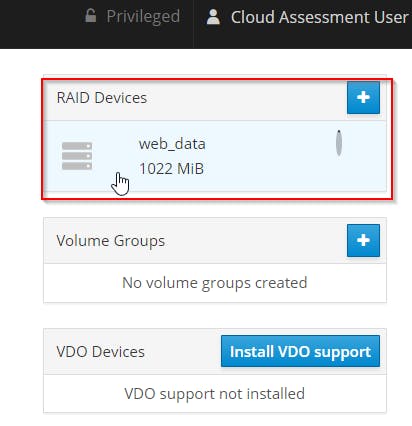
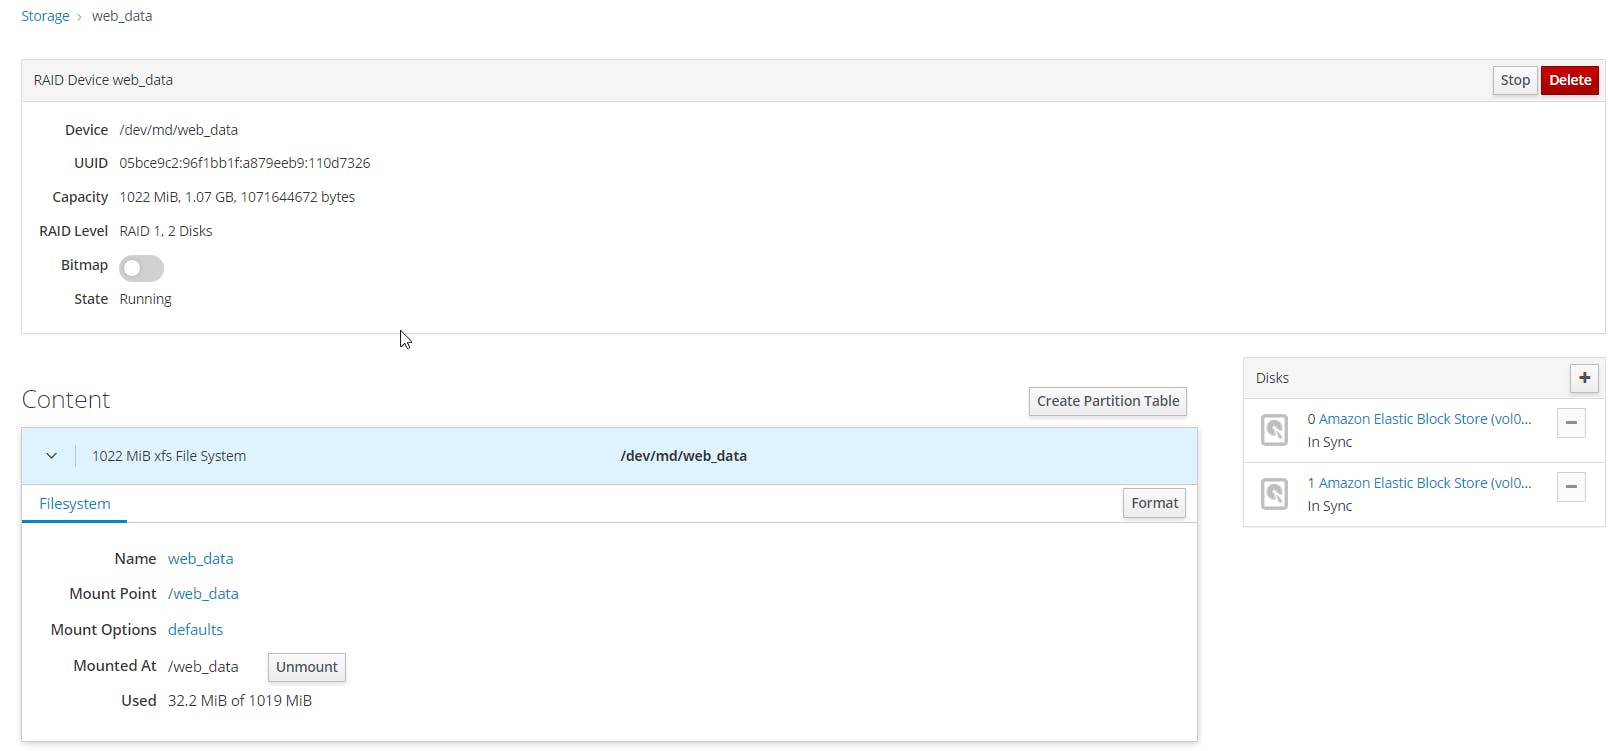
Once it's created, click on it (up in the same RAID Devices section where we clicked +).
Down in the Content section, click the dropdown to the left, in the row containing our
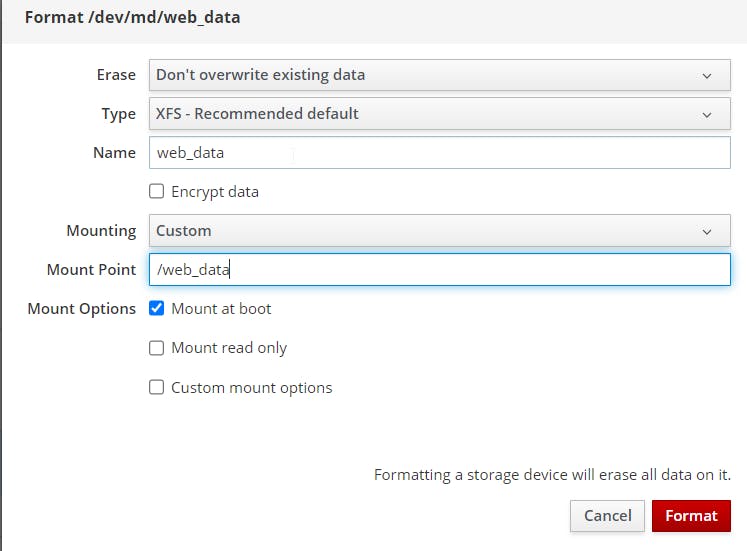
/dev/md/web_datadevice.Click the Format button, and in the window that pops up:
Leave the Erase and Type set to the defaults.
Give it a Name of web_data.
Set Mounting to Custom.
Set the Mount Point to /web_data.
Leave Mount Options set to Mount at boot.
Click Format.
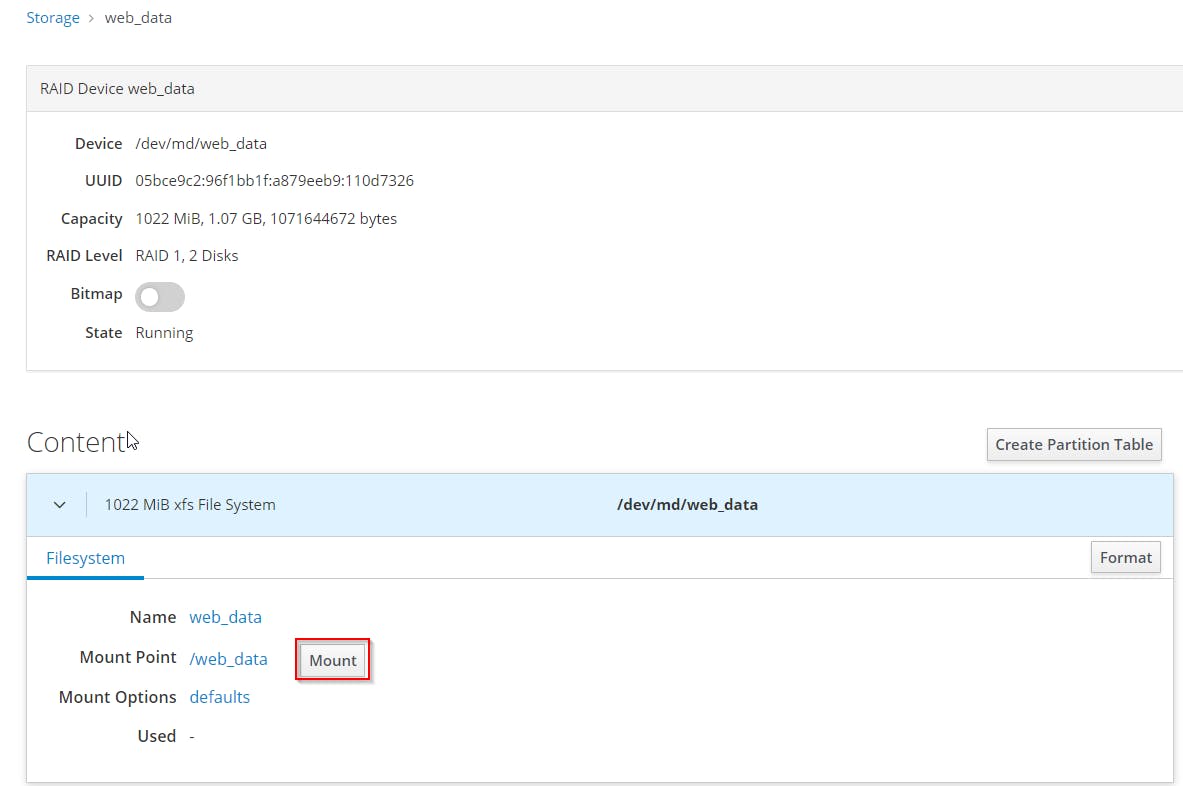
Now we can click the Mount button once we're back out on the Storage > web_data page.
Navigate back to the main Storage page.
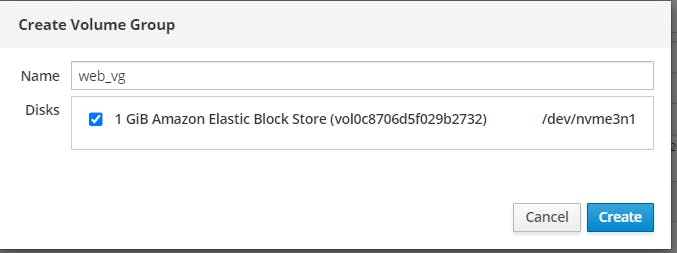
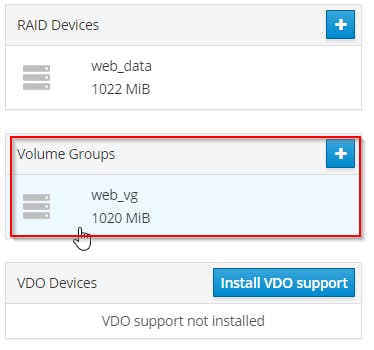
Now we need to create a new volume group (web_vg).
Click the + next to Volume Groups to create a new one (this is just below where we created the RAID device, over on the right of the screen), and in the window that pops up:
Set the Name to web_vg.
Check the box next to the remaining disk.
Click Create.
Back out on the main Storage page, click on our new volume group.
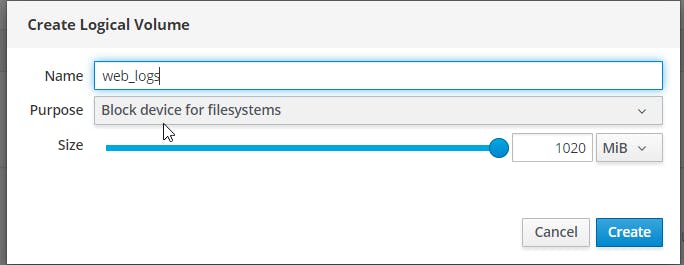
On the next page, click Create new Logical Volume. In the window that pops up:
Give it a Name of web_logs.
Leave the Purpose set to Block device for filesystems.
Set the Size slider to the maximum (1020 MiB).
Click Create.
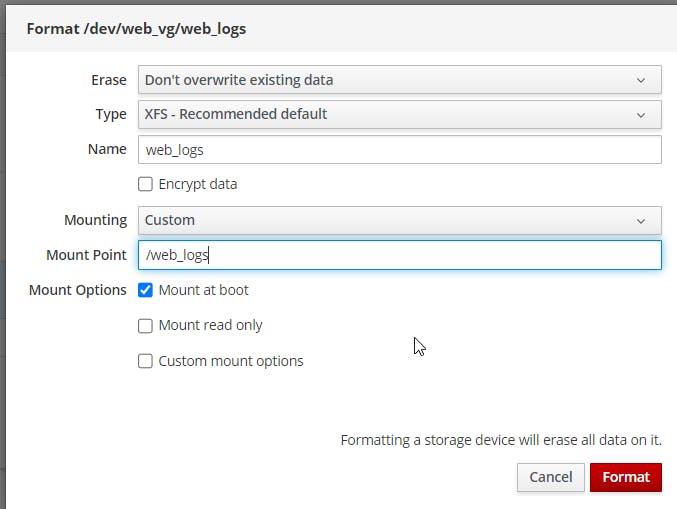
We'll land back out in the Storage > web_vg page. Click the dropdown arrow in the left area of the
dev/web_vg/web_logsrow.Click the Format button, over to the right. In the window that pops up:
Leave the Erase and Type set to the defaults.
Give it a Name of web_logs.
Set Mounting to Custom.
Set the Mount Point to /web_logs.
Leave Mount Options set to Mount at boot.
Click Format.
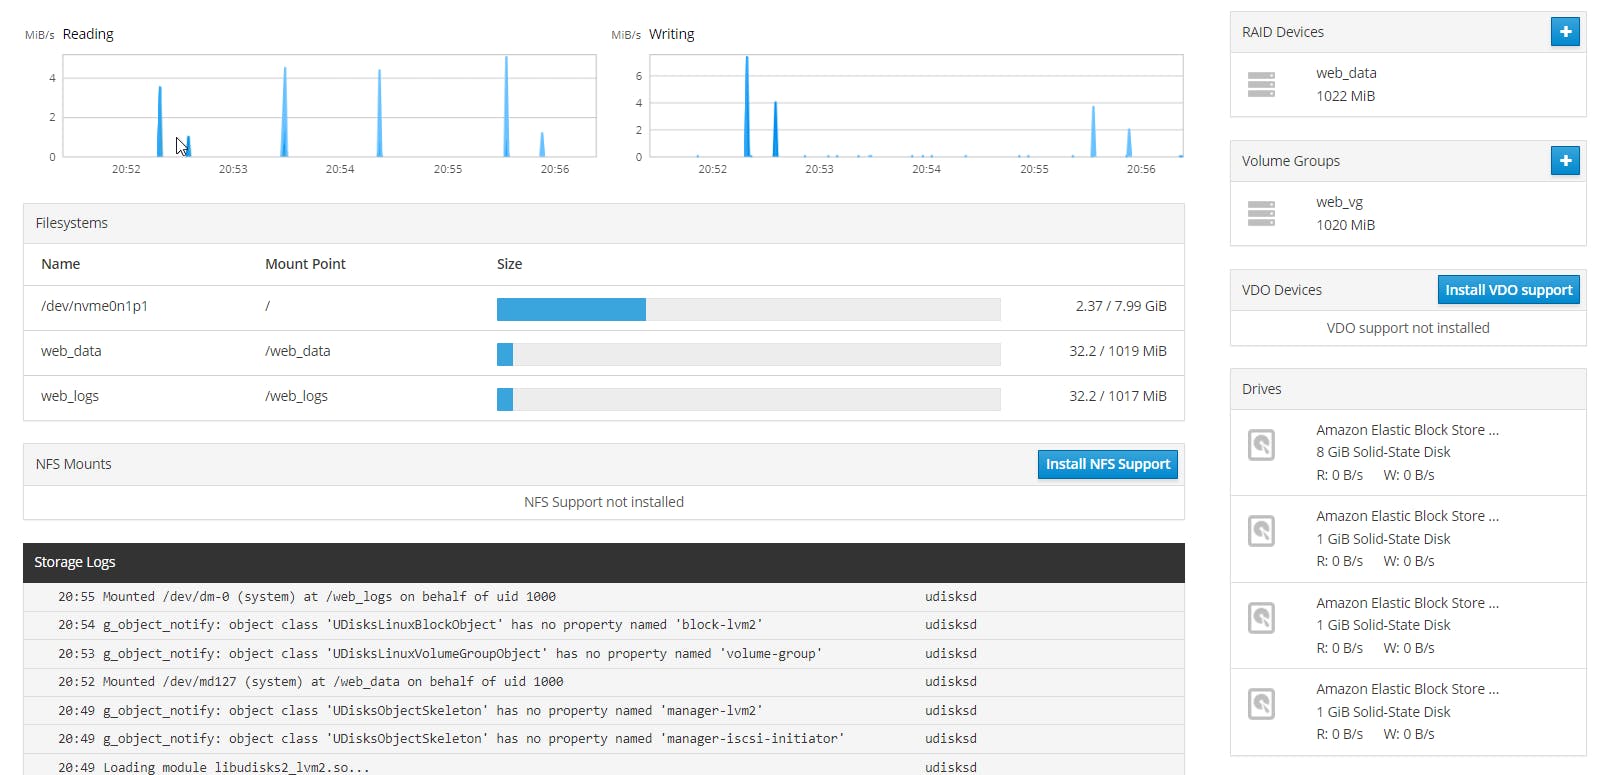
Back out on the Storage > web_vg page, click the Filesystem tab, then click Mount.

Navigate back to the main Storage page.
📝Manage Networking Using Cockpit
We are going to perform several networking tasks with Cockpit.
In the Cockpit interface, get into the first server. Then navigate to Networking in the left-hand menu
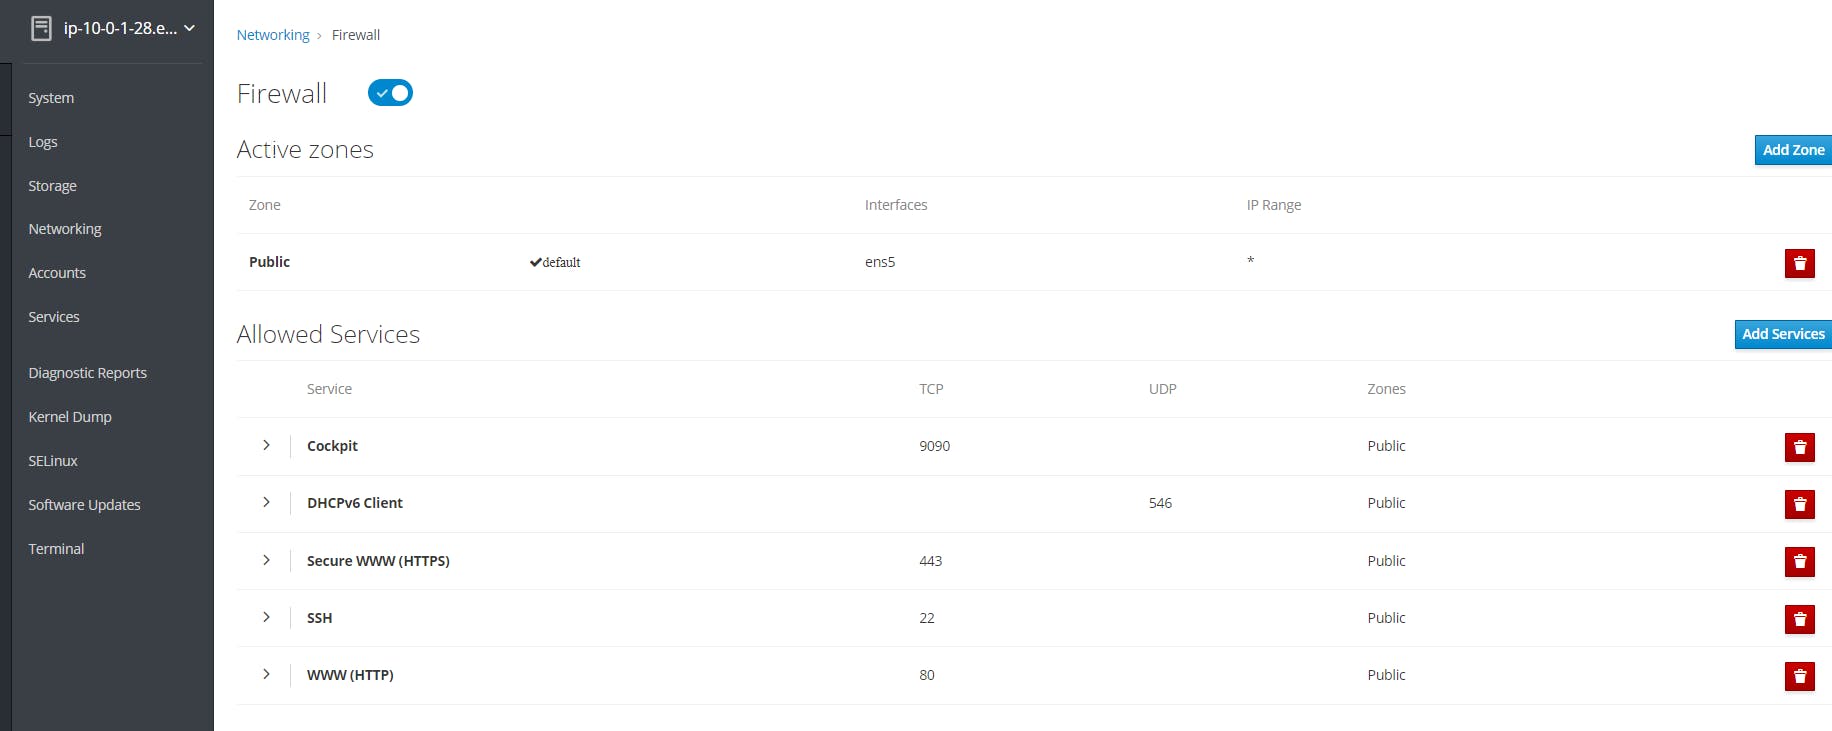
Modify our firewall configuration to enable HTTP and HTTPS traffic:
Click the Firewall link from the main Networking page.
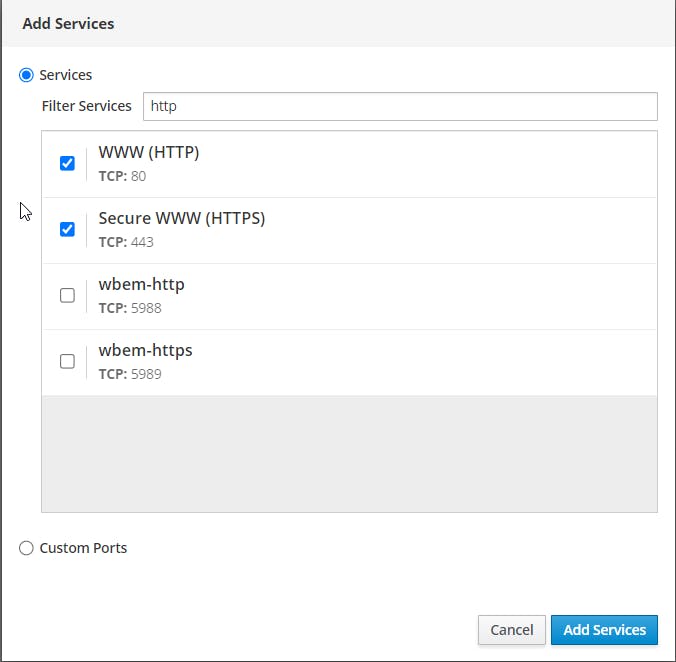
On the Firewall page, click Add Services. In the Add Services window that pops up:
Search for http in the Filter Services box, then check both WWW and Secure WWW in the list that we're given.
Click Add Services.
Click on the main Networking link again.
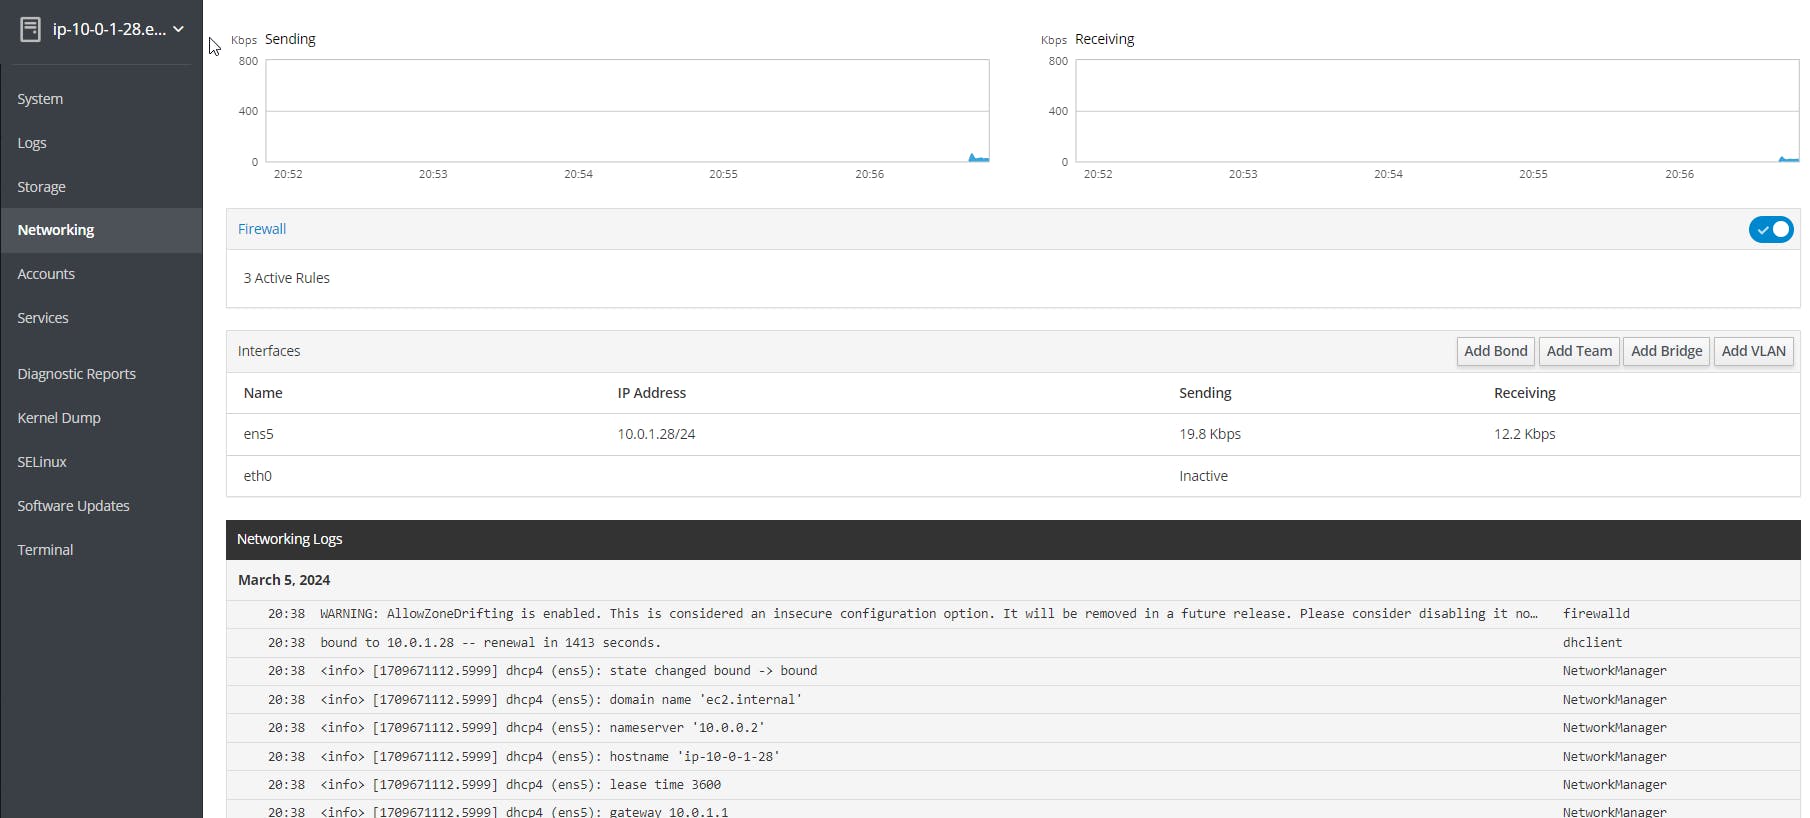
Monitor network traffic:
- There are graphs on the main Networking screen. Below them are links to individual interfaces, which will take us to more specific information.
Review network interfaces:
- Those individual network interface links, in addition to showing network traffic, also allow us to make changes to the interfaces.
Review networking logs:
- Back on the main Networking page, the logs are on the lower half of the screen.
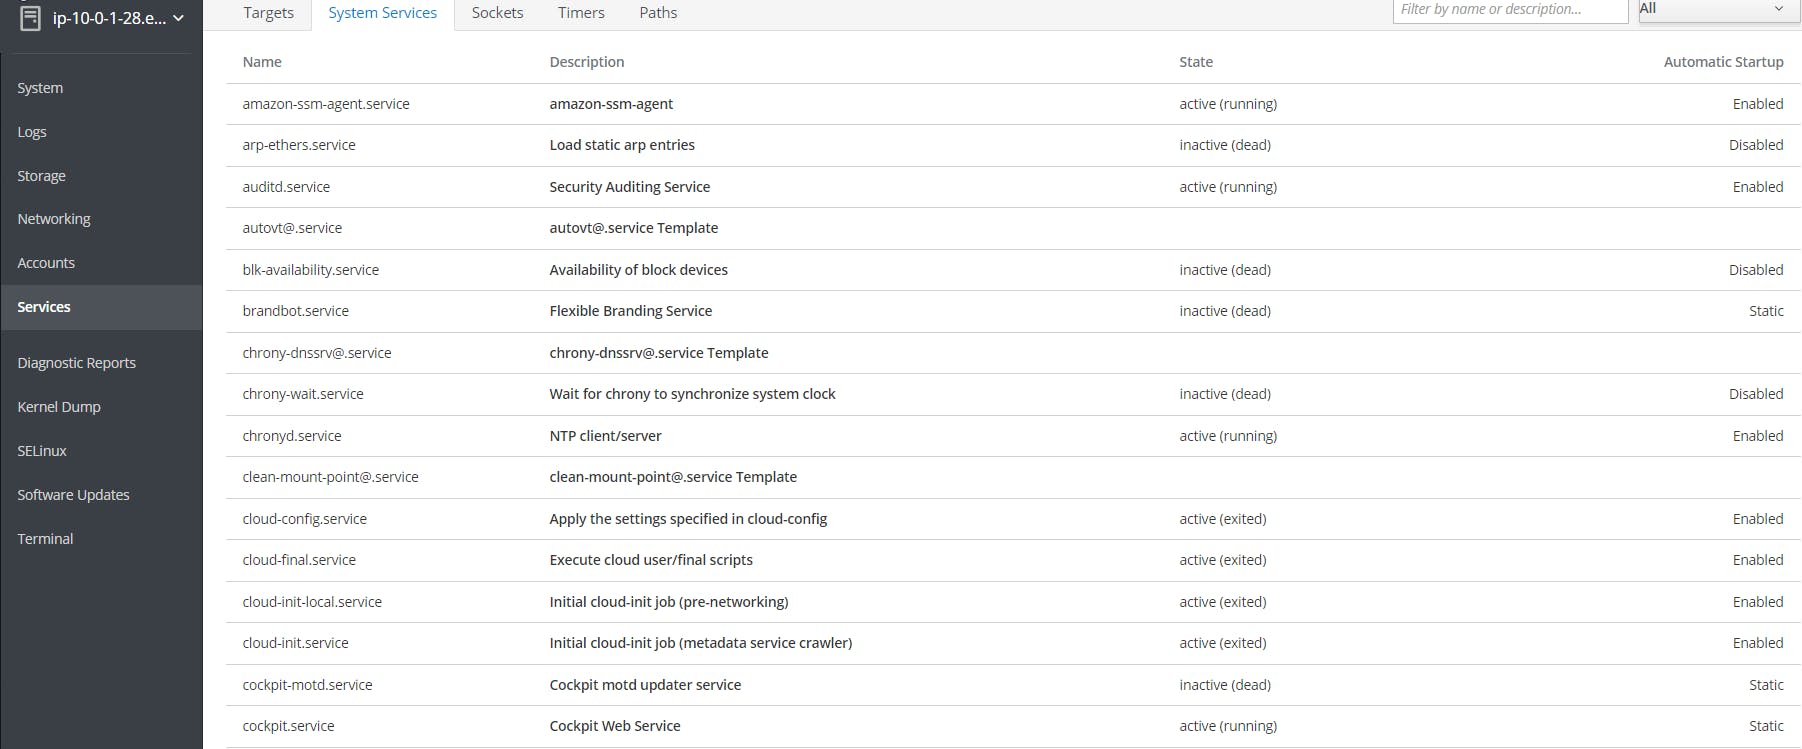
📝Manage systemd Services Using Cockpit
We’re going to look at using Cockpit to manage systemd services. In the Cockpit interface, get into the first server. Then navigate to Services in the left-hand menu.
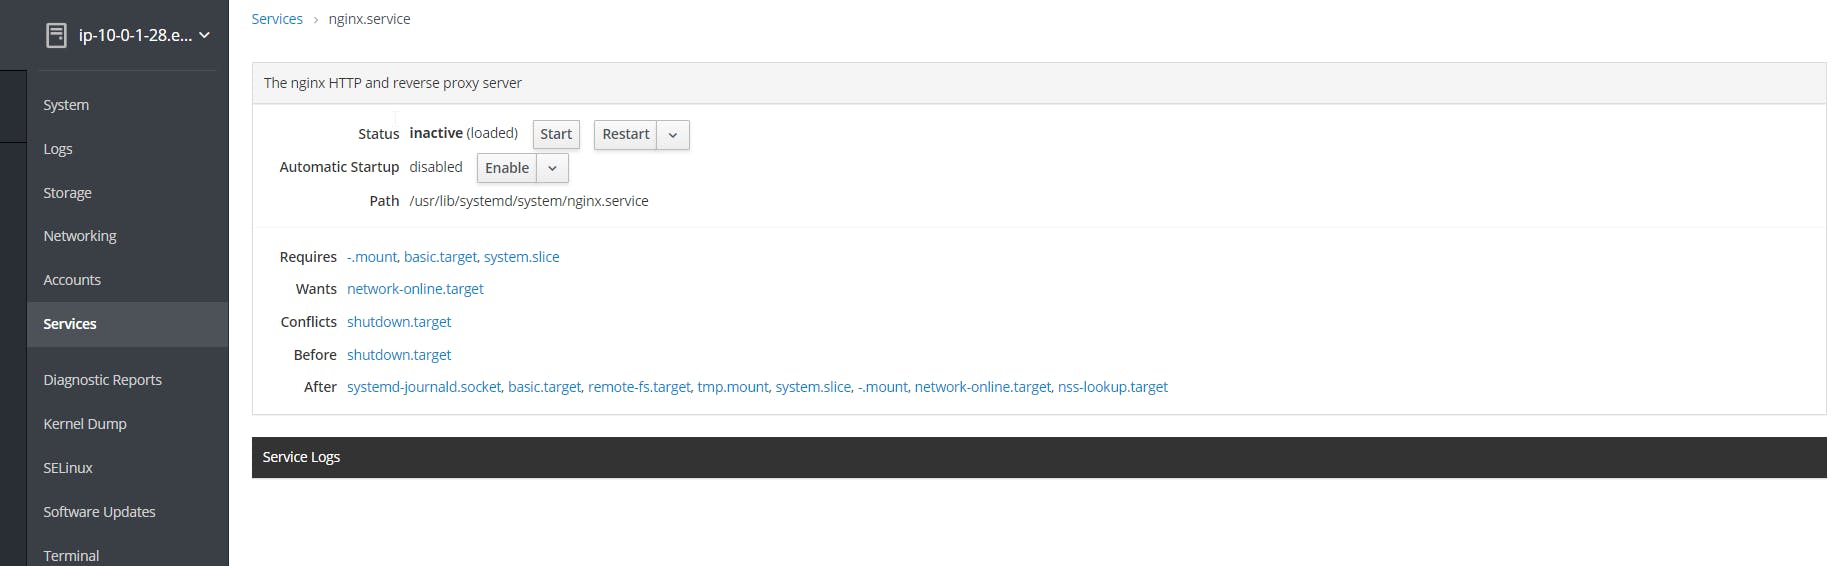
Enable the
nginxweb server service:Make sure that we're in the System Services tab. Then, in the search box (in the upper-right of the screen) start typing nginx. We should see one pop up in the list below, called
nginx.service. Click on it when it appears.On the next screen, choose Enable from the Automatic Startup dropdown, if it's not already chosen, and click Enable.
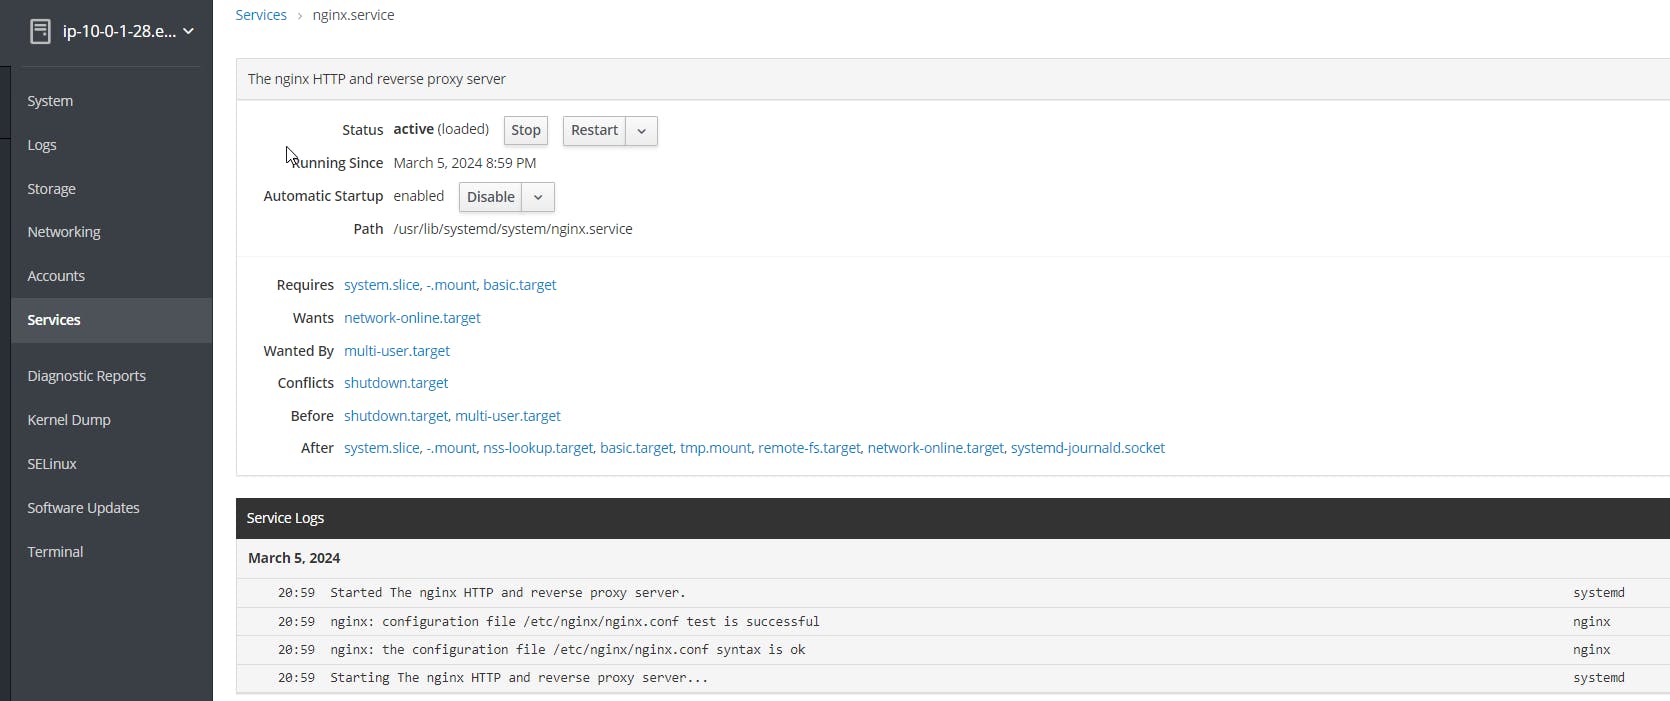
Start the
nginxweb server service:- Next to Status (above the Automatic Startup dropdown), click Start. We should see the Status change from inactive to activating, then to active.
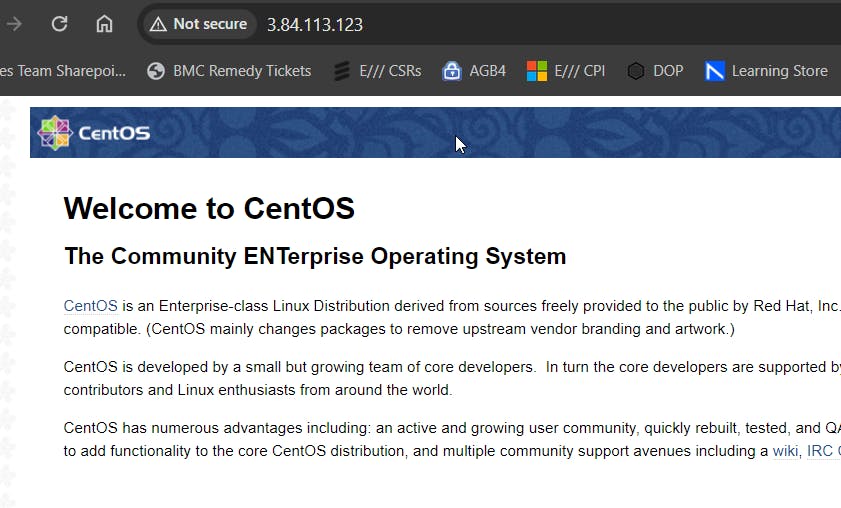
Confirm that the
nginxservice is enabled and running:- The Cockpit interface should confirm for us whether
nginxis running or not, but let's make sure. Connect to thenginxweb server via your web browser (using the server's public IP or DNS, on port 80) to confirm that thenginxservice is working.
- The Cockpit interface should confirm for us whether
📝Patch the CentOS 7 Servers Using Cockpit
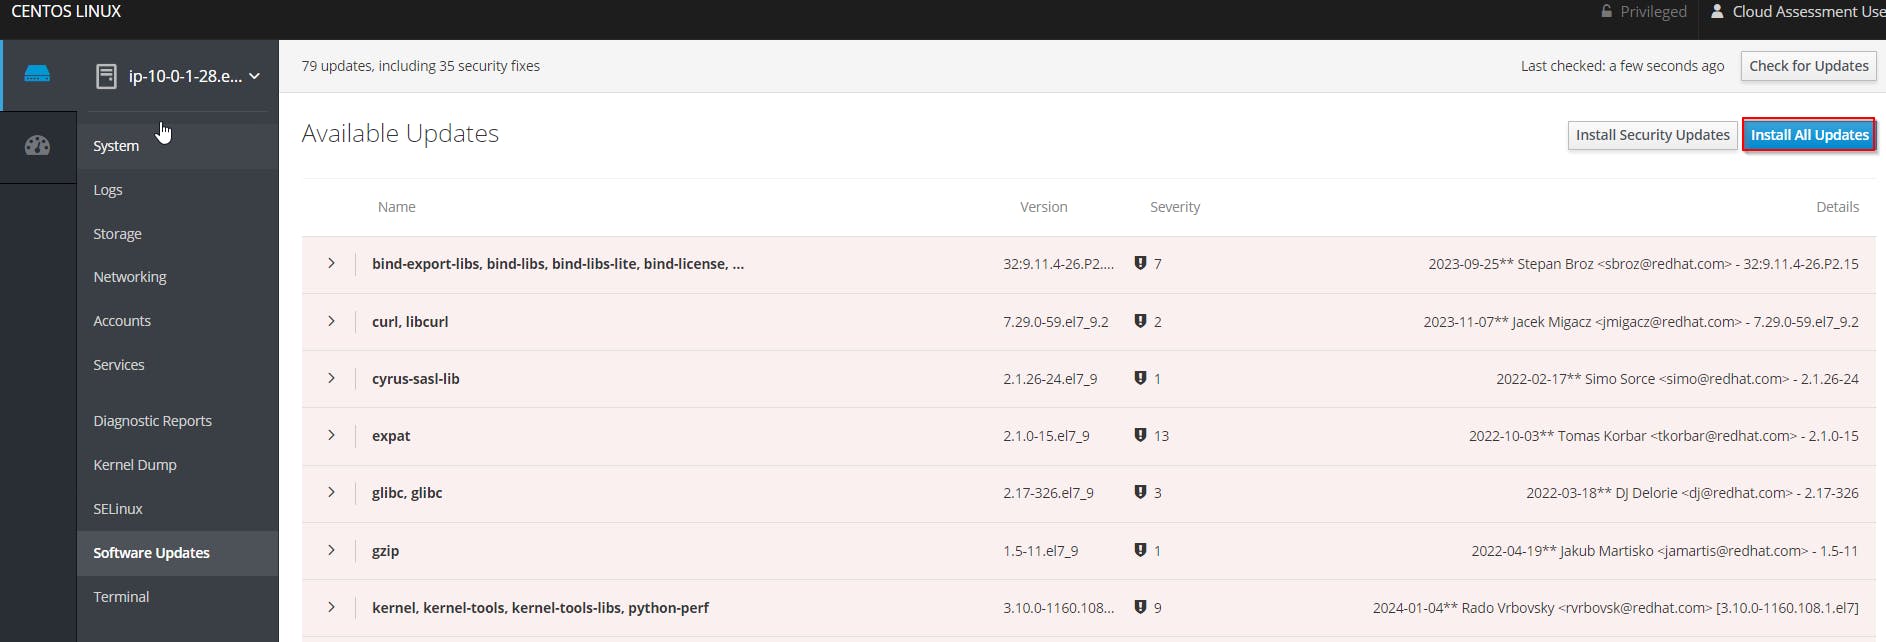
Finally, we will use Cockpit to make sure the CentOS 7 installation on both instances is up-to-date, and if not, update them. Get into the first server, then navigate to the Software Updates page.
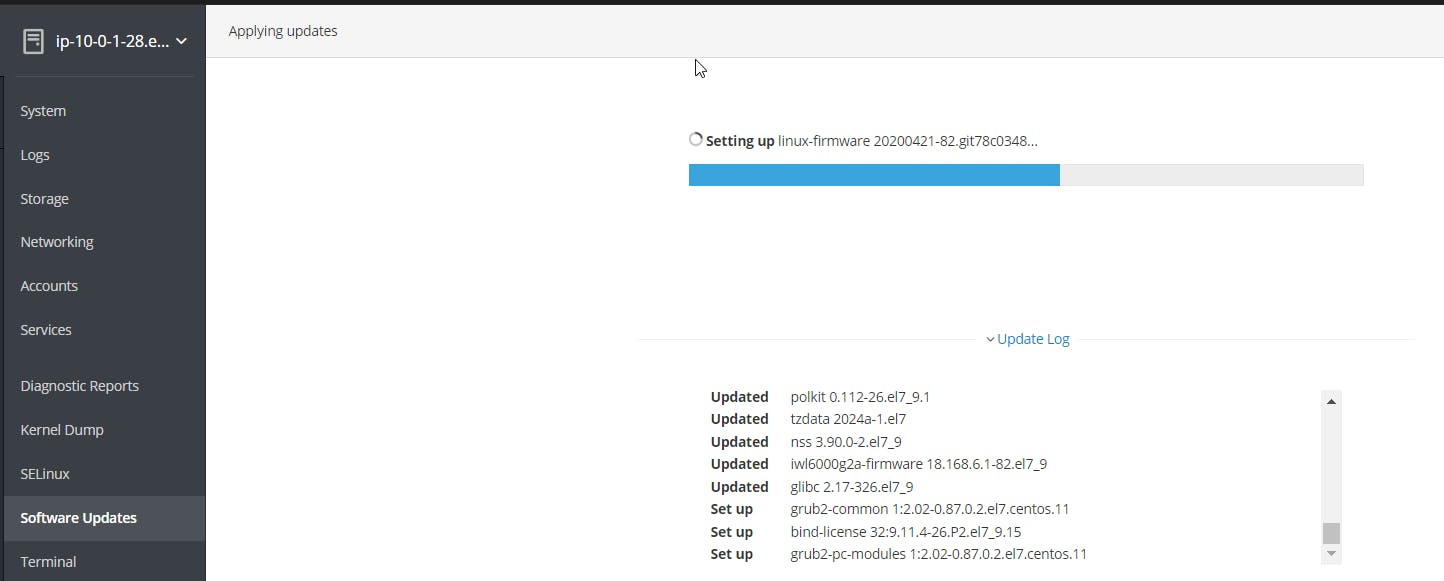
It will automatically show us a list of available updates. Updating is as simple as clicking Install All Updates.
On the next screen, we can watch the progress by clicking the Update Log link.
Repeat the procedure on the second instance.
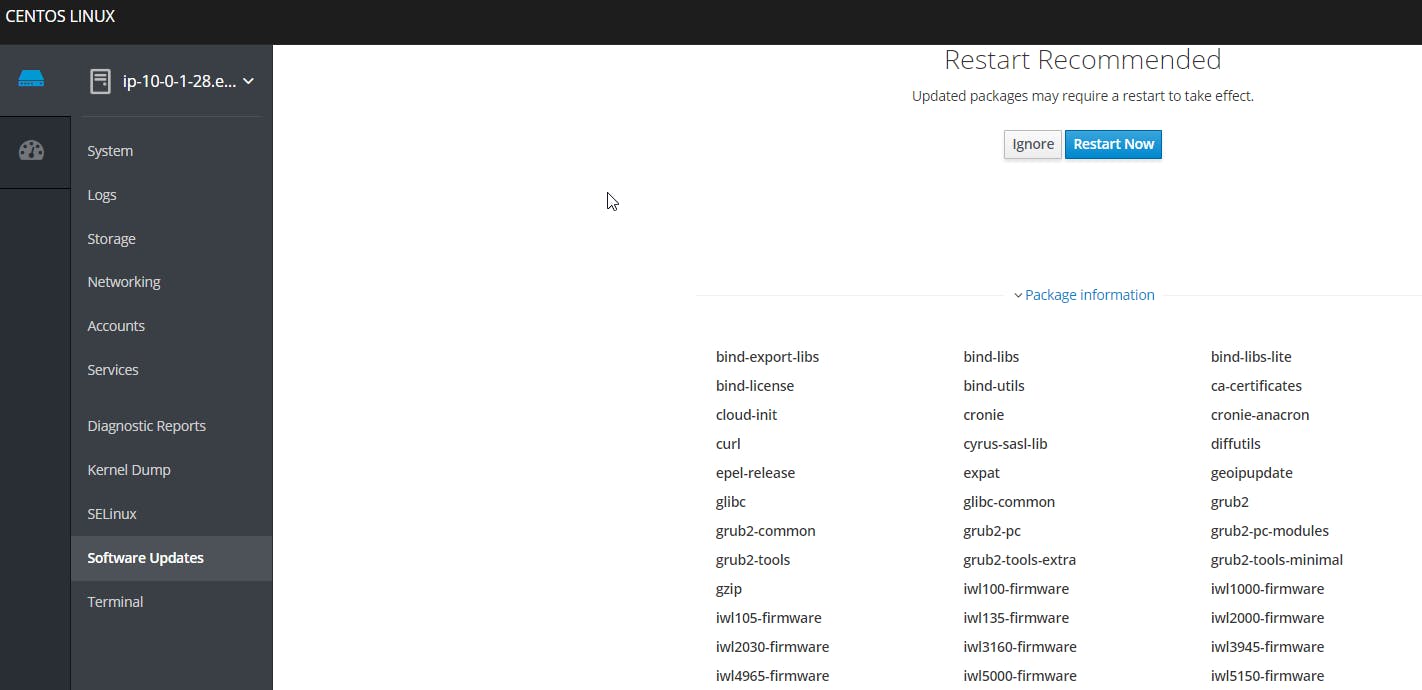
If there is something like a kernel upgrade, then we'll be prompted to restart the server. Restart the second one first, then the first one.
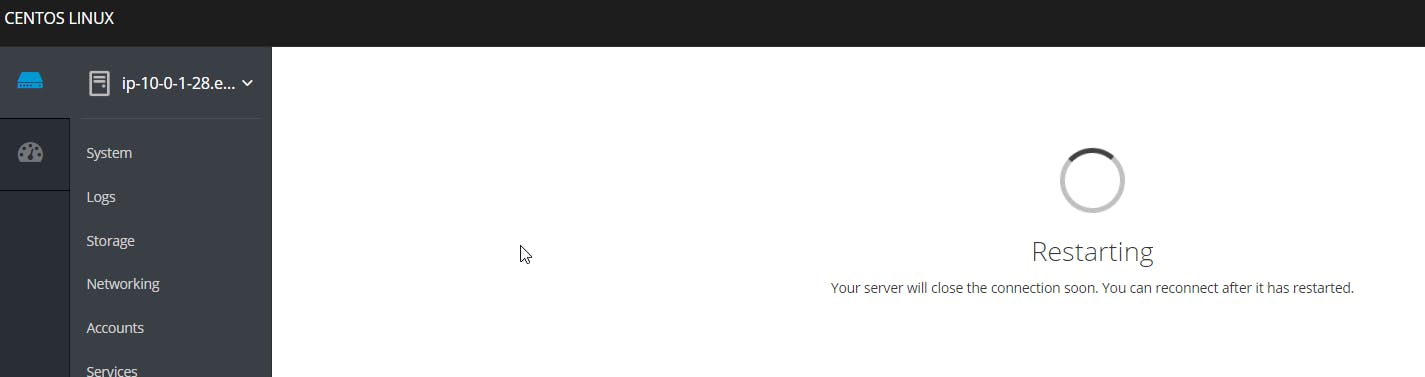
Once each server comes back up, we are finished.
📌Note - At the end of each hands-on Lab, always clean up all the resources previously created to avoid being charged if you used a Cloud Provider to provision them.
Congratulations — you have completed this hands-on lab covering the basics of Install, Config and Manage Cockpit on CentOS 7.
Thank you for reading. I hope you understood and learned something helpful from my blog.
Please follow me on CloudDevOpsToLearn and LinkedIn, franciscojblsouza