Hands-on project of ISTIO/JAEGER/K8/EKS/KIALI for Cloud and DevOps Engineers
Kubernetes hands-on project from the Free SRE/DevOps 30 days Bootcamp3
Table of contents
📝Introduction
In this post, we will cover a K8S project for Monitoring using tools like Kiali and Jaeger for distributed tracing as part of FREE DevOps/SRE BootCamp guided by praveen sigampalli.
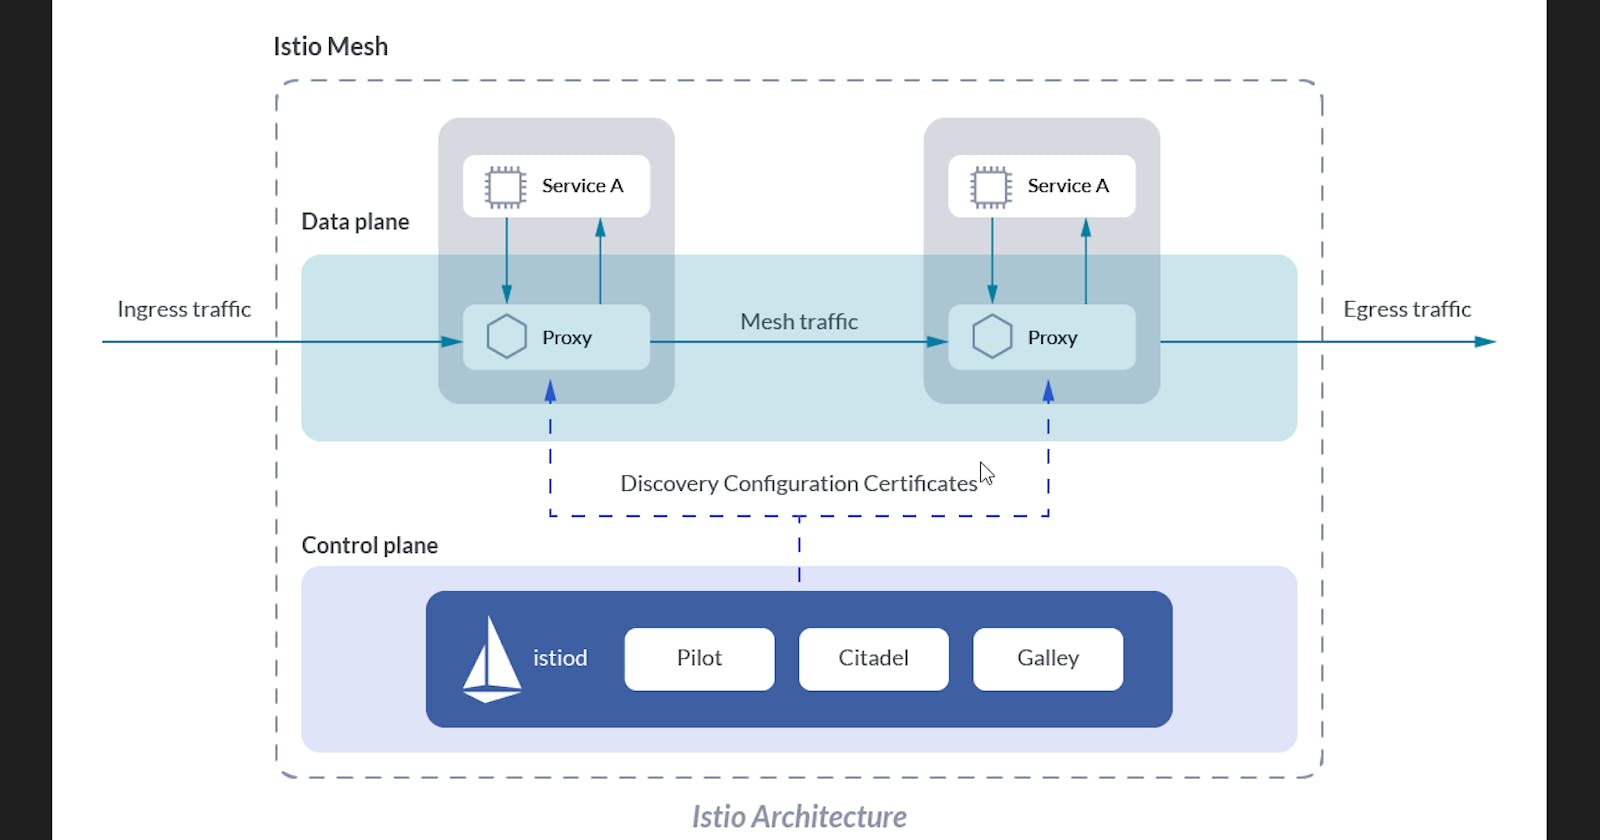
📝What is ISTIO?
It is an open-source service mesh that layers transparently onto existing distributed applications. Istio’s powerful features provide a uniform and more efficient way to secure, connect, and monitor services. Istio is the path to load balancing, service-to-service authentication, and monitoring – with few or no service code changes. For more details, go through this link.
📝Hands-on (Step-by-step)
1 - Log in to the AWS Console with an IAM user(for secure access) and attach an Administrator Access role to it.
2 - Create a T2 Medium instance with the Amazon Linux AMI OS version at an AZ as your preference. In this hands-on, we choose eu-west-3.
The use of this type of instance will charge you at least 2€ (I was charged in 2.06€), depending on how long you use it, so you do not forget to delete all resources at the end of this hands-on.
3 - Install kubectl (To access the PODs and resources of K8s]
curl -LO "https://dl.k8s.io/release/$(curl -L -s https://dl.k8s.io/release/stable.txt)/bin/linux/amd64/kubectl"
curl -LO "https://dl.k8s.io/$(curl -L -s https://dl.k8s.io/release/stable.txt)/bin/linux/amd64/kubectl.sha256"
echo "$(cat kubectl.sha256) kubectl" | sha256sum --check
sudo install -o root -g root -m 0755 kubectl /usr/local/bin/kubectl


4 - Install eksctl ( To create the cluster)
curl --silent --location "https://github.com/weaveworks/eksctl/releases/latest/download/eksctl
_$(uname -s)_amd64.tar.gz" | tar xz -C /tmp
sudo mv /tmp/eksctl /usr/bin
eksctl version

5 - Create the cluster
eksctl create cluster --name=eksistiodemo --region=eu-west-3 --zones=eu-west-3b,eu-west-3a --without-nodegroup


6 - Add OIDC(Open-ID connect)
eksctl utils associate-iam-oidc-provider --region eu-west-3 --cluster eksistiodemo --approve

7 - Add nodes
eksctl create nodegroup --cluster=eksistiodemo --region=us-west-1 --name=eksistiodemo-ng-public --node-type=t2.medium --nodes=2 --nodes-min=2 --nodes-max=4 --node-volume-size=10 --ssh-access --ssh-public-key=key-test --managed --asg-access --external-dns-access --full-ecr-access --appmesh-access --alb-ingress-access


Check the pods that are running.

8 - Install ISTIO
curl -L https://istio.io/downloadIstio | ISTIO_VERSION=1.18.1 TARGET_ARCH=x86_64 sh -

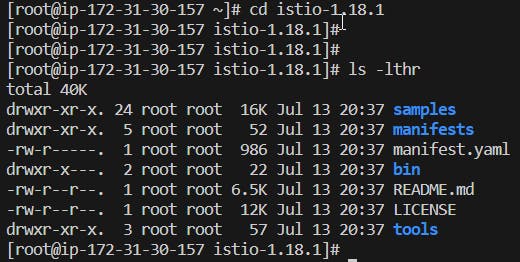
Go into the ISTIO directory and check the installation directory contains:
cd istio-1.18.1
The installation directory contains:
Sample applications in samples/
The istioctl client binary in the bin/ directory
10 - Set the PATH and install the ISTIO with demo profile
export PATH=$PWD/bin:$PATH

11 - Deploy nodes
kubectl apply -f ttps://raw.githubusercontent.com/istio/istio/release-1.18/samples/bookinfo/platform/kube/bookinfo.yaml

12 - Check kubectl services
kubectl get svc

13 - Check pods
kubectl get pods


14 - Use the below command to get some info from an specific POD
kubectl exec "$(kubectl get pod -l app=ratings -o jsonpath='{.items[0].metadata.name}')" -c ratings -- curl -sS productpage:9080/productpage | grep -o "<title>.*</title>"

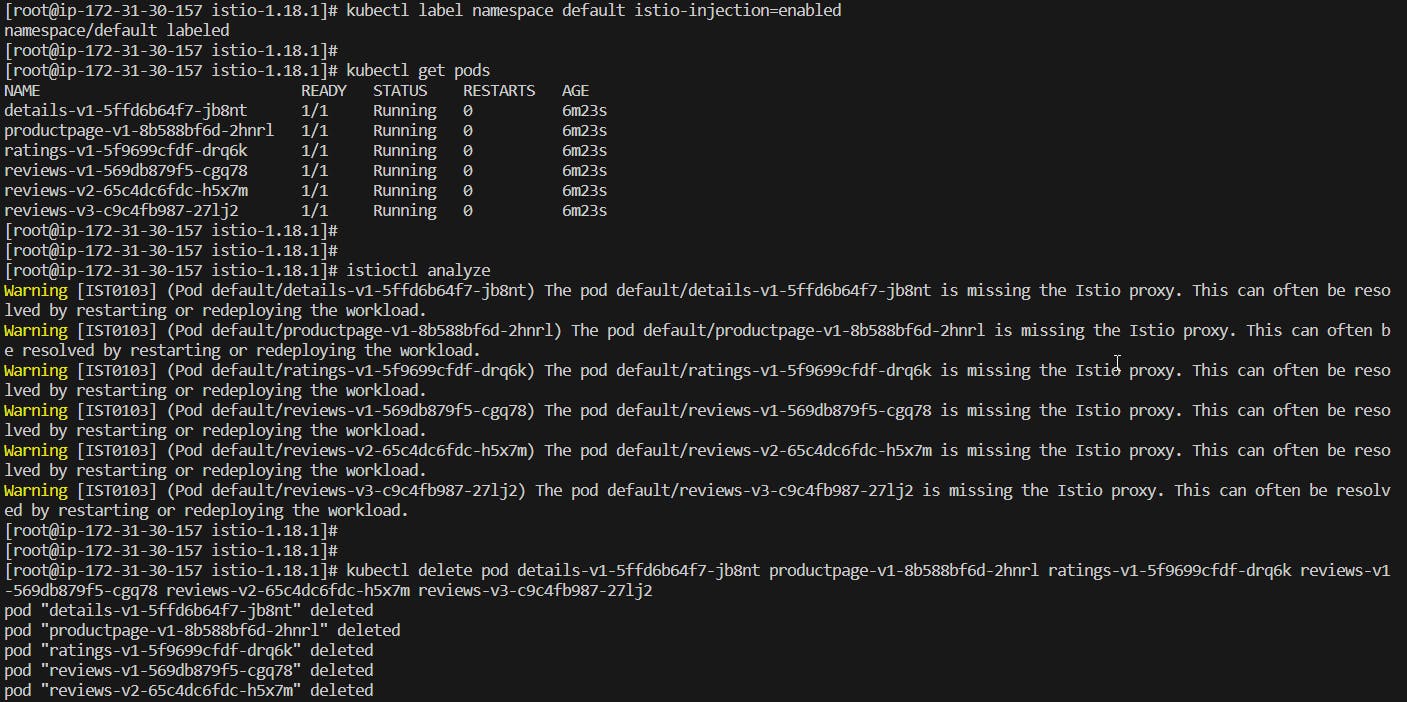
15 - To inject ISTIO as init container which will force to run 2 containers per POD. Run ISTIO analyze and delete all pods to force to run 2 containers per POD.
kubectl label namespace default istio-injection=enabled
istioctl analyze
kubectl delete pod <pod_name>


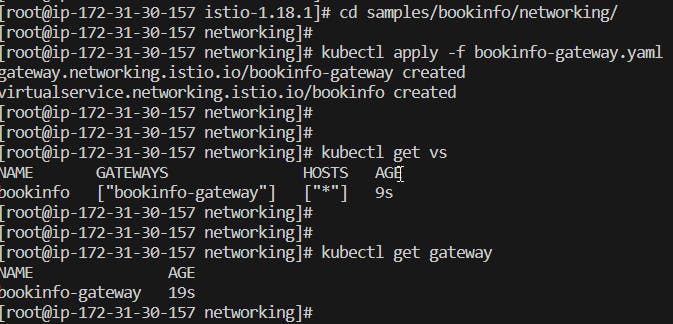
16 - Go into samples/bookinfo/networking/ on istio-1.18.1 directory and deploy the gateway.
cd samples/bookinfo/networking/
kubectl apply -f bookinfo-gateway.yaml
kubectl get vs
kubectl get gateway
17 - Ingress the ISTIO gateway, set the ingress IP/ports and check the secure port in use.
kubectl get svc istio-ingressgateway -n istio-system
export INGRESS_HOST=$(kubectl -n istio-system get service istio-ingressgateway -o jsonpath='{.status.loadBalancer.ingress[0].ip}') export INGRESS_PORT=$(kubectl -n istio-system get service istio-ingressgateway -o jsonpath='{.spec.ports[?(@.name=="http2")].port}') export SECURE_INGRESS_PORT=$(kubectl -n istio-system get service istio-ingressgateway -o jsonpath='{.spec.ports[?(@.name=="https")].port}')
echo $SECURE_INGRESS_PORT

18 - Export Ingress host using your Load Balancer DNS name
export INGRESS_HOST=aa2bf1a8d9bae4152a7c9bacdb730375-2012932597.eu-west-3.elb.amazonaws.com
export GATEWAY_URL=$INGRESS_HOST:$INGRESS_PORT
echo $GATEWAY_URL

19 - Open the below URL to check the app running
echo "http://$GATEWAY_URL/productpage"
i.e.
http://aa2bf1a8d9bae4152a7c9bacdb730375-2012932597.eu-west-3.elb.amazonaws.com:80/productpage

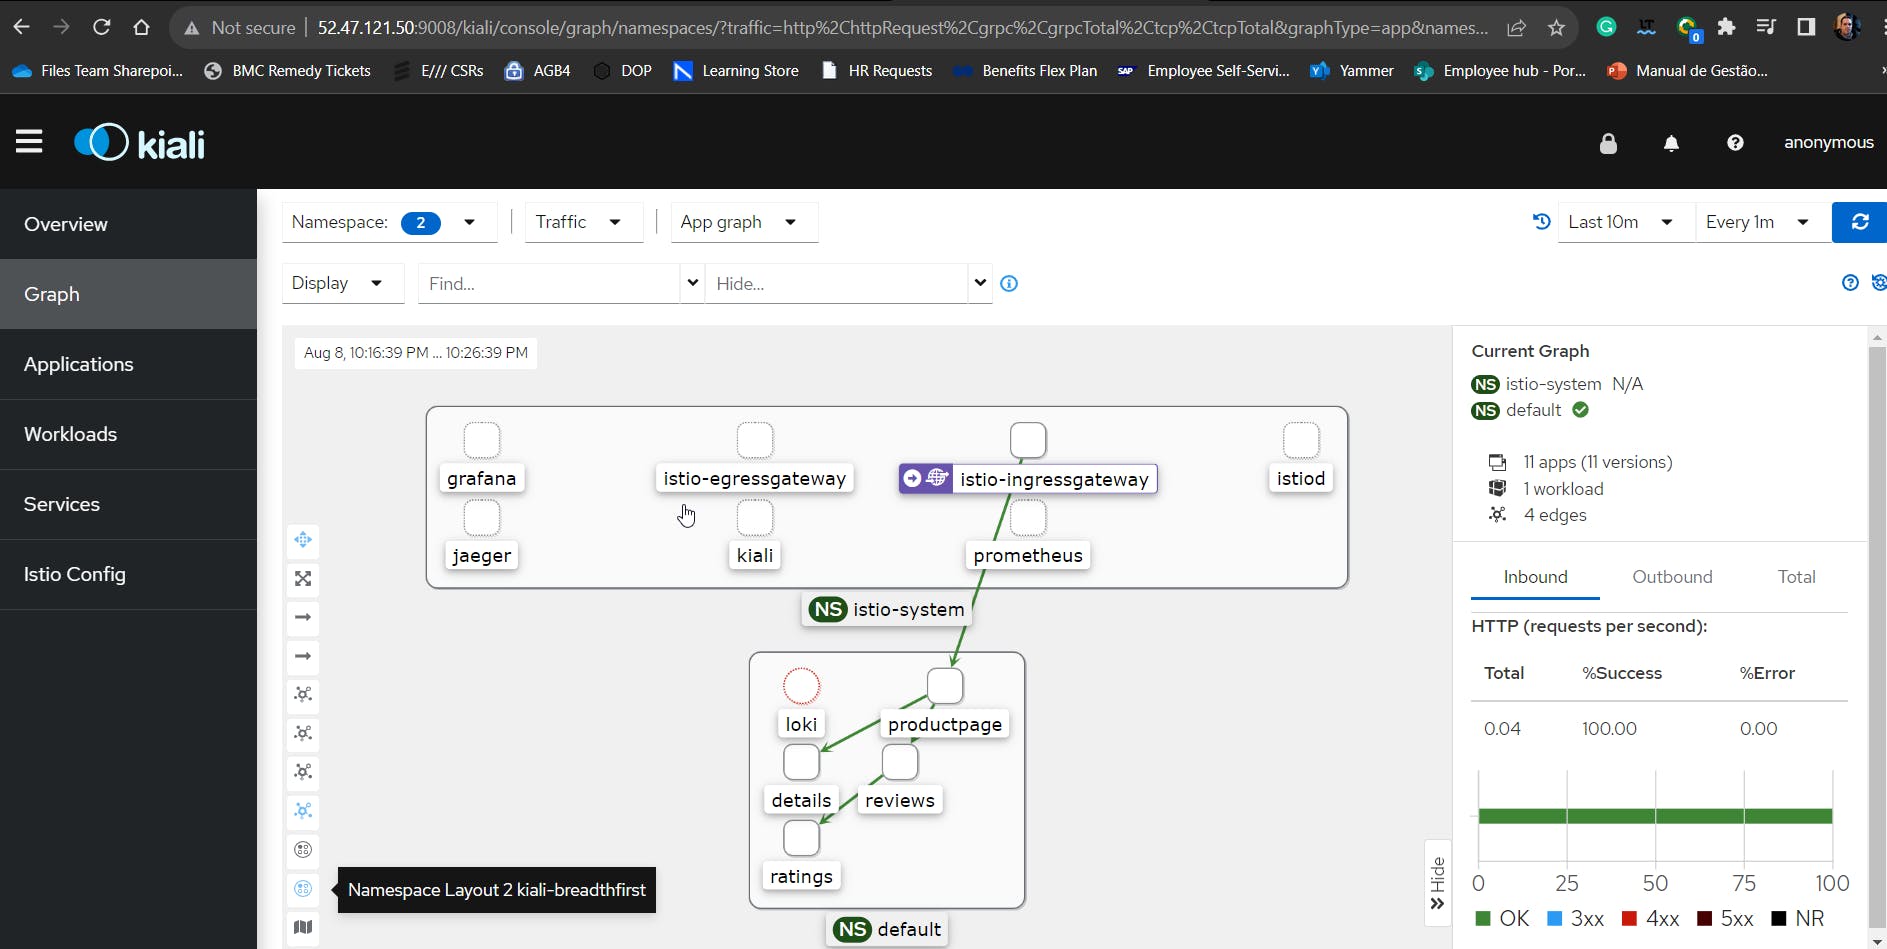
20 - Check the Kiali tool dashboard console for monitor ISTIO service mesh. First, go into the /addons directory and deploy the addons for Kiali.
cd istio-1.18.1/samples/addons
kubectl apply -f .
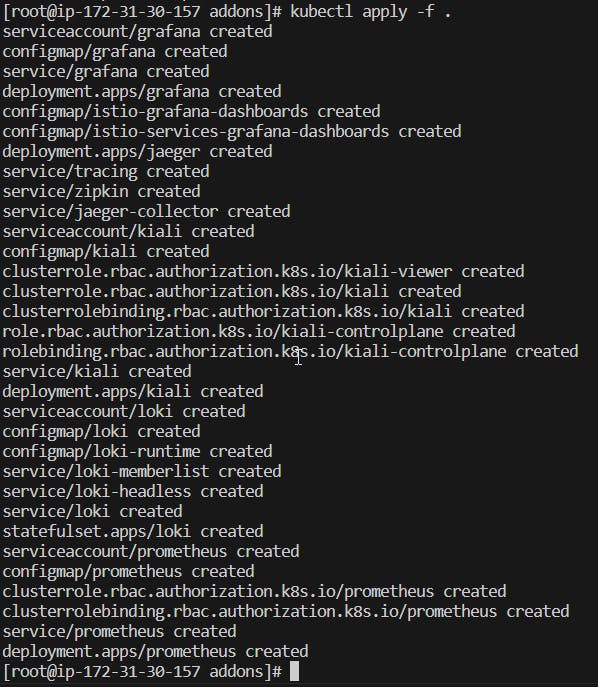
21 - Port Forward to access Kiali Dashboard. Make sure to allow port 9008 on your EC2 SG.
kubectl port-forward --address 0.0.0.0 svc/kiali 9008:20001 -n istio-system
i.e.
http://<your_EC2_IP>:9008/kiali/console/overview?duration=60&refresh=60000

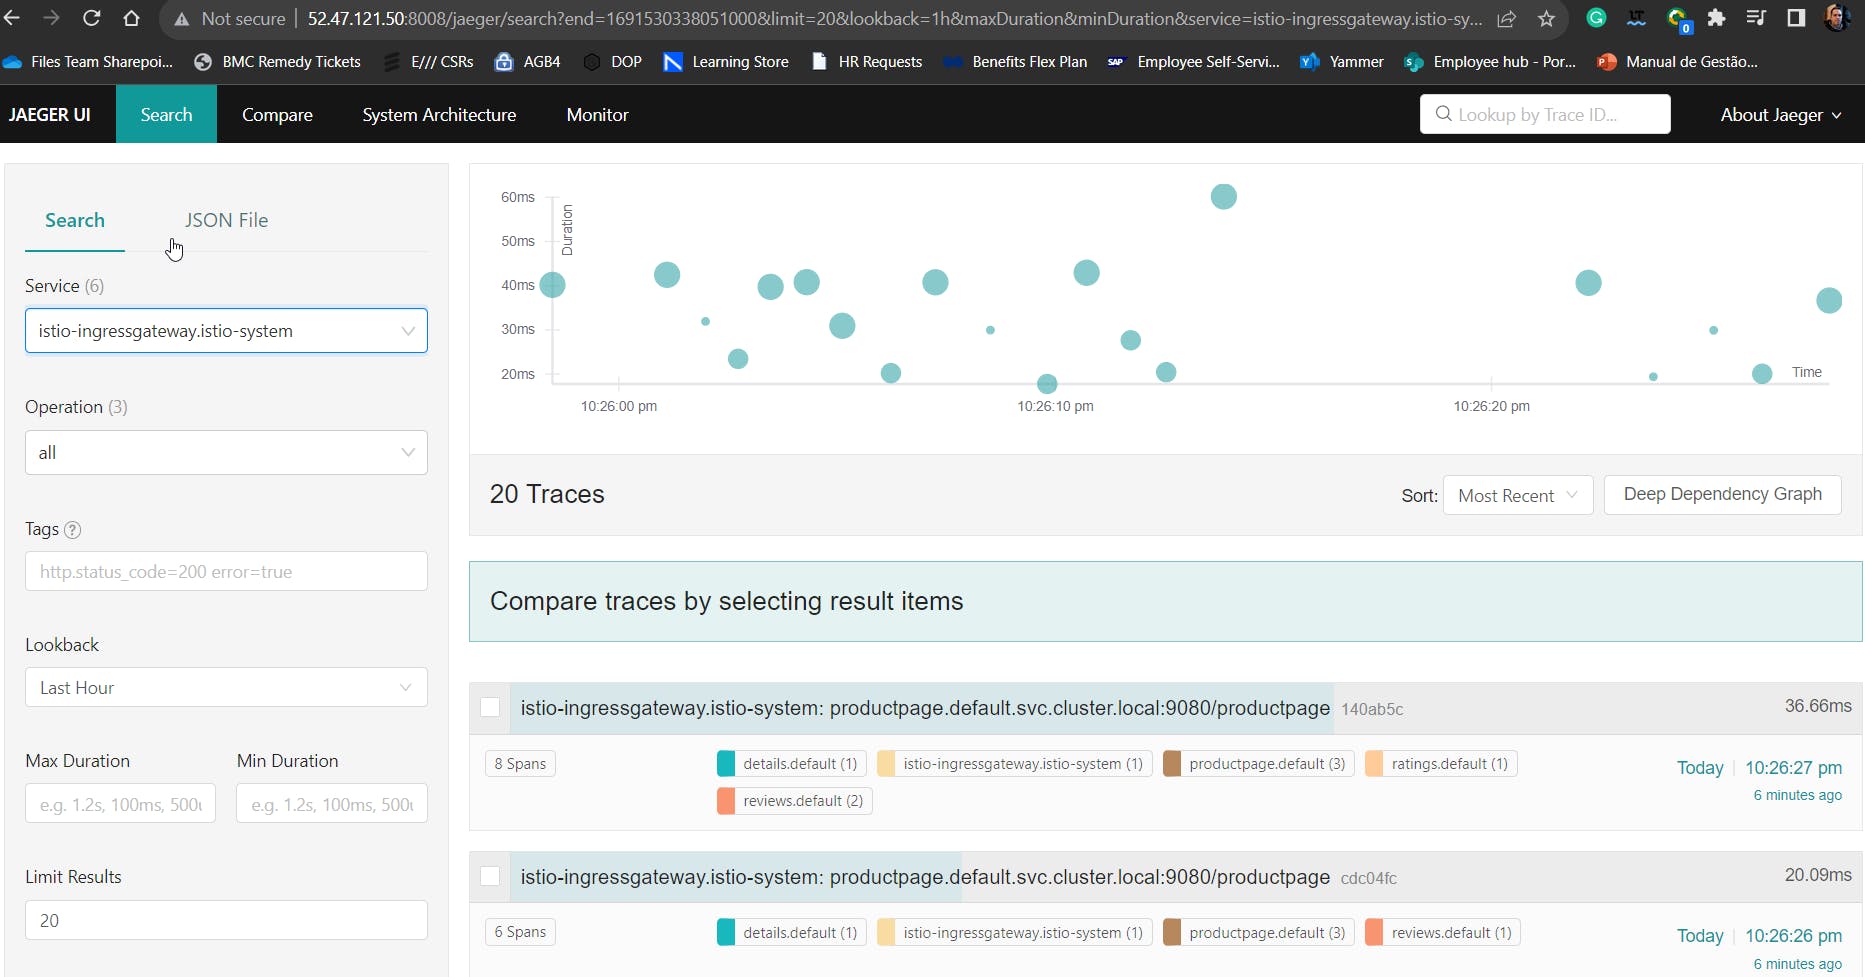
22 - Check the Jaeger tool used to monitor and troubleshoot transactions in complex distributed systems. First, perform a port forward to access it and make sure to allow port 8008 on your EC2 SG.
kubectl port-forward --address 0.0.0.0 svc/tracing 8008:80 -n istio-system
i.e.
http://<your_EC2_IP>:8008/jaeger
23 - After completing the hands-on, please, do not forget to delete all the resources created on AWS to avoid being charged more than you have used.
eksctl delete nodegroup --cluster=eksistiodemo --region=eu-west-3 --name=eksistiodemo-ng-public
eksctl delete cluster --name=eksdemo --region=eu-west-3


Thank you for reading. I hope you were able to understand and learn something helpful from my blog.
Please follow me on Hashnode and on LinkedIn franciscojblsouza

