


Azure Hands-On Labs - Creating a Web App and Deploying Code from GitHub Using PowerShell
Azure Learning Path for Cloud and DevOps Engineers


📝Introduction
This post demonstrates this hands-on lab, where we walk through creating an Azure web app and insert configuration information into that web app using the code from a GitHub repository — all using PowerShell.
To complete this hands-on lab, perform the following:
Log in to the VM
Open PowerShell and install the Az module.
Connect to the Azure account using the provided credentials.
Perform the necessary commands to create an app service plan and a web app.
Perform the necessary commands to apply the configuration from this GitHub repo.
📝Log in to the Azure Management Console
Using your credentials, make sure you're using the right Region. In my case, I am using west-us and southcentralus.
📌Note: You can also use the VSCode tool or from your local PowerShell to connect to Azure PowerShell
More information on how to set up it is on the link.
📝Prerequisites:
Update to PowerShell 5.1, if needed.
Install .NET Framework 4.7.2 or later.
Visual Code
Web Browser (Chrome, Edge)
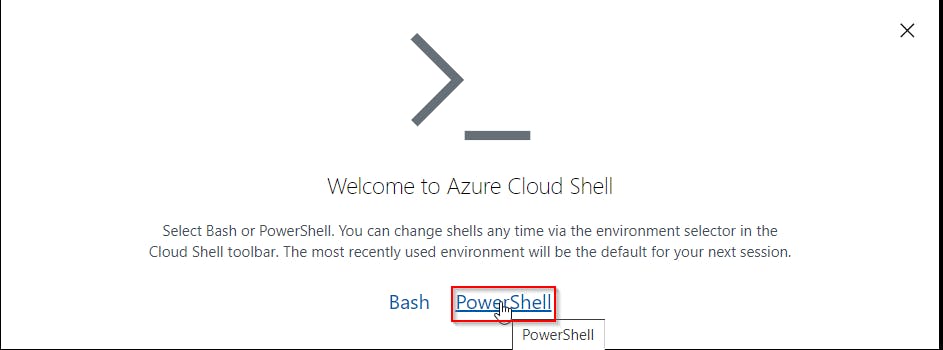
📝Setting an Azure Storage Account to Load PowerShell
- Click the Cloud Shell icon
(>_)at the top of the page.

- Click PowerShell.
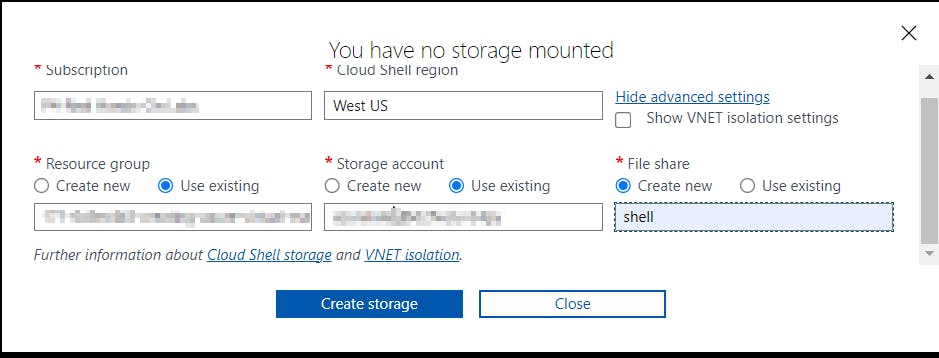
- Click Show Advanced Settings. Use the combo box under Cloud Shell region to select the Region. Under Resource Group and Storage account(It's a globally unique name), enter a name for both. In the box under File Share, enter a name. Click ***Create storage (***if you don't have any yet).
📝Log in to the Linux VM
Open a new terminal.
Copy the public IP address provided with this hands-on lab.
Connect to the VM via SSH using the public IP provided on the lab page:
ssh cloud_user@<PUBLIC_IP_OF_THE_VM>
Once logged in, start the PowerShell prompt:
pwsh
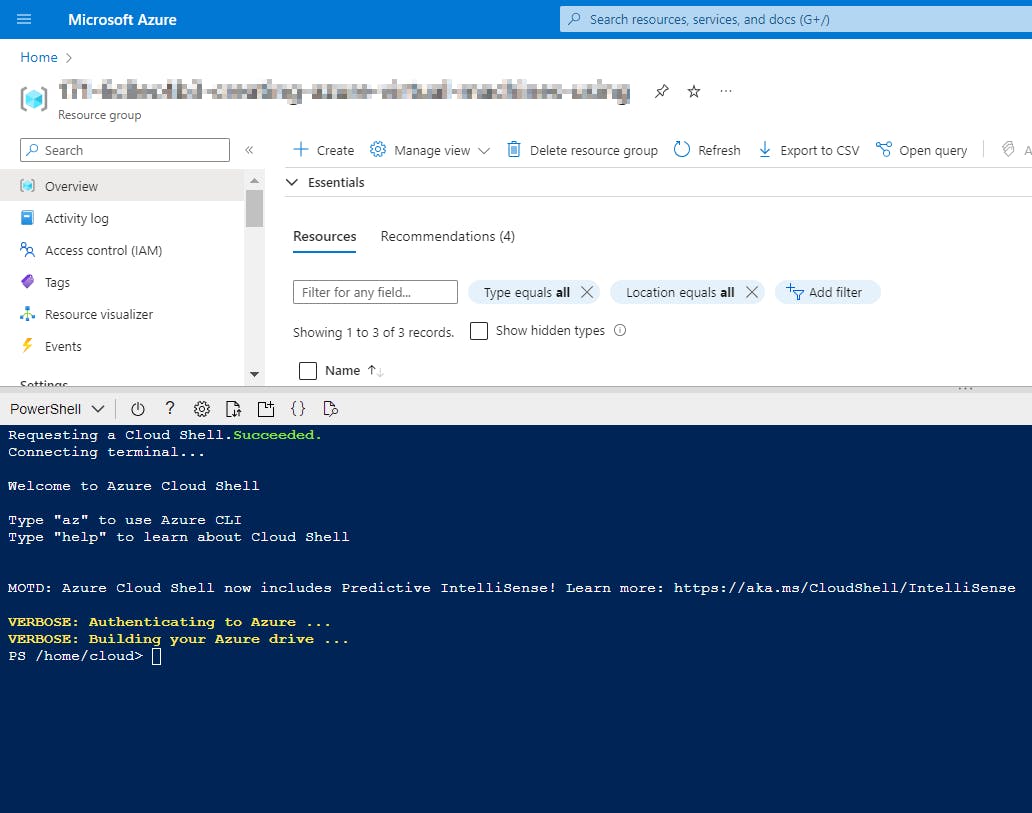
📝Install the Az Module and Connect to Azure
Install the module:
Install-Module -Name Az -AllowClobber -Scope CurrentUser
Enter Y to continue installing from the PowerShell gallery. It will take a couple of minutes to finish.

From the PowerShell prompt, connect to Azure:
Connect-AzAccount -UseDeviceAuthentication
In the browser, navigate to https://microsoft.com/devicelogin.
Enter the code provided in the terminal.
Enter the Azure Portal username and password provided on the lab page.

📝Create the Azure App Service Plan, Web App and Apply the Config to Web App
Get the name of the resource group provisioned with the lab:
Get-AzResourceGroup

Copy the name into a text file; we'll need it in a minute.
Create a script:
vim script.ps1
To avoid adding unnecessary spaces or hashes when you copy in the next code, first enter :set paste.
Paste the following into the script (replacing <UNIQUE_WEB_APP_NAME> with a globally unique name — e.g., demo1webapp with a series of numbers at the end):
$gitrepo = "https://github.com/fjblsouza/app-service-web-dotnet-get-started.git"
$webappname = "demo1webapp"
$location = "West US"
$resourceGroup = '208-fb922768-creating-a-web-app-and-deploying-code'

New-AzAppServicePlan -Name $webappname -Location $location -ResourceGroupName $resourceGroup -Tier Free

New-AzWebApp -Name $webappname -Location $location -AppServicePlan $webappname -ResourceGroupName $resourceGroup

$PropertiesObject = @{
  repoUrl = "$gitrepo";
  branch = "master";
  isManualIntegration = "true";
}

Set-AzResource -PropertyObject $PropertiesObject `
 -ResourceGroupName $resourceGroup `
 -ResourceType Microsoft.Web/sites/sourcecontrols `
 -ResourceName $webappname/web `
 -ApiVersion 2015-08-01
 -Force

Save and quit the script by hitting Escape and running the script, followed by:
:wq!
./script.ps1
It may take up to five minutes to run.
Get information about the new web app:
Get-AzWebApp
It may take a few minutes to complete.
In the output, copy the URL listed beside HostNames and paste it into the browser. We should see an ASP.NET page.


📌Note - At the end of each hands-on Lab, always clean up all the resources previously created to avoid being charged.
Congratulations — you have completed this hands-on lab covering the basics of Creating an Azure Web App and Deploying Code from GitHub Using PowerShell.
Thank you for reading. I hope you understood and learned something helpful from my blog.
Please follow me on CloudDevOpsToLearn and LinkedIn, franciscojblsouza